
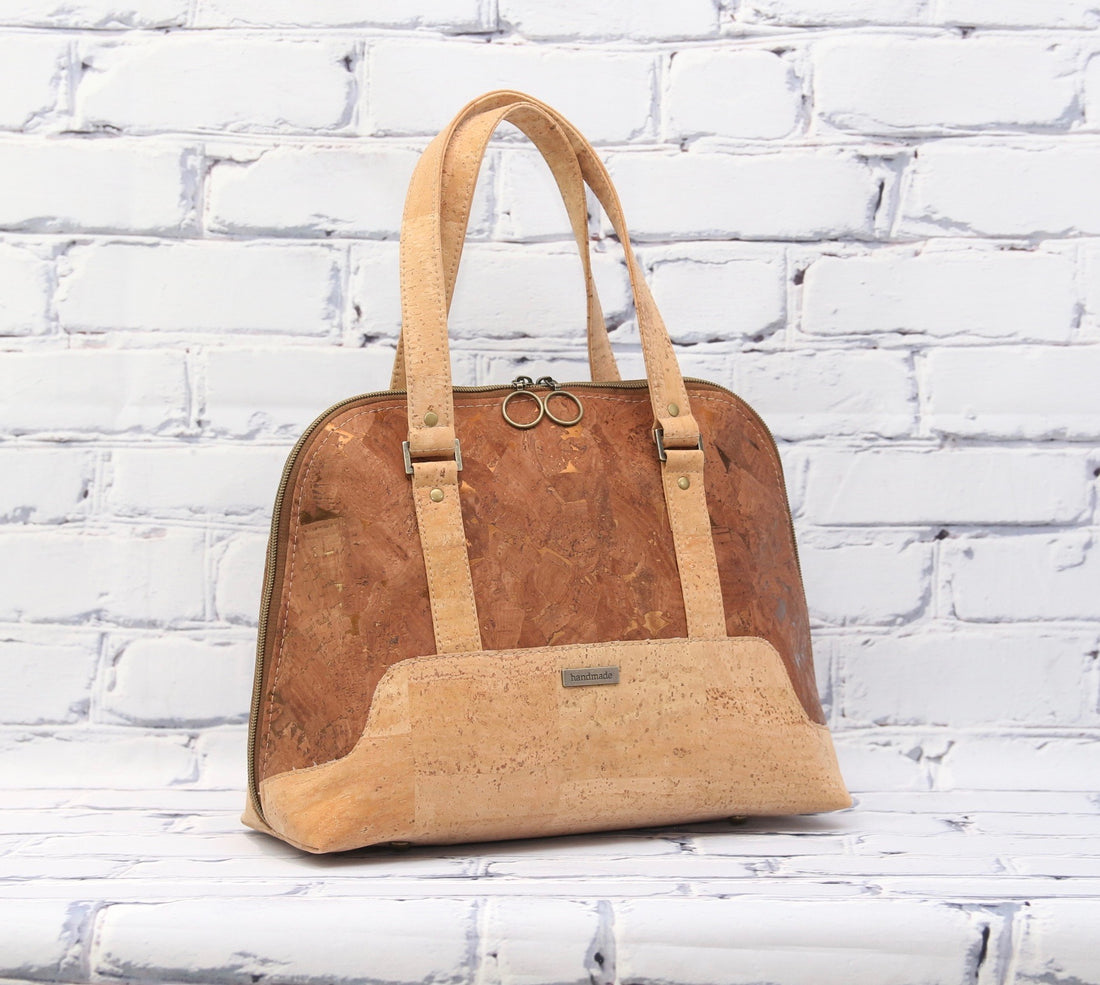
Cork it Up : Boronia Bowler Bag

The Cork it Up" series is a brand new series of tutorials that show how to adapt some of my existing patterns to an all cork exterior.
Today I’ll show you my second pattern in this series. It’s the Boronia Bowler Bag. Boronia is a medium-sized handbag that may appear difficult to sew, but it’s actually sewn like a very large zipper pouch, (with some exceptions). You must purchase the Boronia pattern to follow this tutorial. Before you begin, take a few minutes to read through and familiarize yourself with the entire pattern. Next, print/cut out your pattern pieces.
As usual, all cork used for this project was purchased from MM Cork Supply and owner Sheri Ferraro provided her expertise.
Let's get started!
SUPPLY LIST CHANGES:
Instead of a combination of fabric with cork/vinyl, you will make the exterior entirely out of cork. If you are using a single cork colour/pattern, you will need to purchase 1/2 yard.
I used two coordinating cork fabrics of the following quantities:
1) The Guilded Bark in Bronze cork required a piece that was 18" W x 20" H. Since the quarter yard piece is not quite big enough, I had to purchase a half yard but will have plenty leftover for another project.
2) The Natural Cork was also a 1/2 yard piece because of the height required for the overlay piece. Again, plenty will remain for another project.
HANDLES: You will need 1.5 yards of pre-made strapping OR make your own strap with one of the cork fabrics mentioned above. Since you have 1/2 yard pieces, there is plenty for the handles.
DOUBLE PULL ZIPPER: I made my own double pull zipper using my zipper tape by the metre for this bag. You can also buy ready made double pull zippers. Please make sure the zipper is the recommended length of 36", either using zipper tape or a pre-made zipper.
HARDWARE: There are no changes to the hardware but please note that I will not be making an adjustable cross body strap in this tutorial.
PATTERN PIECES: Follow the section in the pattern however, please print an additional 2 copies of BODY A pattern pieces found on pages 16-17. Tape together as instructed.

With this new pattern piece, start by cutting off the tiny portion just underneath the "FOAM FOLD LINE".

For the rest of the pattern piece, draw a line all the way around that is 1/2" in from the outer edge EXCEPT for the bottom "FOAM FOLD LINE".

Cut away that 1/2" space all the way around (except for the bottom straight edge).

You will now use this new pattern piece to cut the interfacing for the body of your bag. Instead of foam interfacing, I like to use "Stiff Stuff" sew-in interfacing by Lazy Girl Designs for my cork bags. It is very similar to Peltex but thinner.

To cut the interfacing, I place my pattern piece on top of the Stiff Stuff and draw out the shape of the pattern piece. I then flip the pattern piece vertically making sure the FOAM FOLD LINE is lined up perfectly and then I draw out the pattern's shape again. The FOAM FOLD LINE will be our centre and help with lining up our pieces during construction.
CUTTING SECTION CHANGES:
Other than the changes to the foam interfacing I just mentioned, you will cut your EXTERIOR pieces from the BODY A pattern piece as instructed in the pattern, however you will NOT need any fusible woven interfacing.
For the HANDLES, you can cut and sew them as instructed in the pattern. I will be using a different method in this tutorial where the handles are sewn in a loop that is easier and less bulky to sew but also provides a more professional finish. If you're not comfortable with rivets and your machine is a domestic model, you may also want to try this alternate method. Cut either (2) strap pieces that are 2" W x 40" L OR (4) strap pieces that are 2" W x 21" L. For this tutorial, I have cut 4 pieces.
OMIT the binding step and follow the alternate finishing method I used in the Boronia video series on my YouTube channel.
The rest of the cutting section will NOT change.
INTERFACING CHANGES:
Other than the switch to Stiff Stuff instead of foam interfacing mentioned previously, the only other change will be to omit the fusible woven interfacing on your EXTERIOR cork pieces.
EXTERIOR ASSEMBLY CHANGES:

On the WS of your EXTERIOR cork pieces, draw a line 1/2" from the outer edges around the curved edge but not the bottom straight edge.

Spread a thin layer of fabric glue on the WS of the EXTERIOR cork pieces. Do not put any glue in that 1/2" of space around the curved edge. I used Fabri-Tac glue but you can use the brand you prefer.

Using the 1/2" line as a guide, glue one matching end of "Stiff Stuff" interfacing to the WS of one EXTERIOR cork piece. Then repeat to glue the other EXTERIOR cork piece to the opposite end of the "Stiff Stuff" interfacing piece. Let the glue dry.
HANDLE ASSEMBLY CHANGES:
Before assembling your STRAP CONNECTORS, let's sew our handles using the loop method that I mentioned above.
NOTE: I cut (4) strap pieces that were 2" W x 21" L. If you cut (2) pieces that were 2" W x 40" L, you will need to adjust the following instructions slightly.

1. Start by drawing a horizontal line through the centre of your HANDLE pieces on the WST.


2. SKIP THIS STEP if you cut 40" pieces. Start by clipping two shorter ends of the strap pieces RST and then sew them together with 1/2" seam allowance. Open up the seam allowance and topstitch on either side of the seam.

3. Slip the HANDLE piece through two rectangle rings. Sew the shorter ends together as instructed in Step 2. You should now have a HANDLE loop with two rectangle rings attached.

4. Apply a strip of double-sided tape along the centre line on the WS of your HANDLE.

5. Remove the tape backing and fold in both halves of the HANDLE piece towards the centre line, WST. Use clips to hold in place if your tape is not very sticky.

6. When you've folded both halves in towards the centre all the way around, put each rectangle ring at opposite ends of the strap loop. Flatten your loop with the raw edges hidden in the middle of the strap layers. Use clips to keep the HANDLE strap layers together. Sew together with an elongated rectangle box of stitching, with 1/8" seam allowance along the longer sides and pivot the strap to sew beneath the rectangle rings.

One completed HANDLE. Repeat steps for second HANDLE.
Follow the pattern's instructions to sew your STRAP CONNECTORS.

Once your STRAP CONNECTORS have been sewn, you can follow the rest of the pattern to complete your bag.
If you're struggling with any of the instructions, there is a video series for this pattern on my YouTube channel.
Boronia Bowler video series by Blue Calla Patterns.