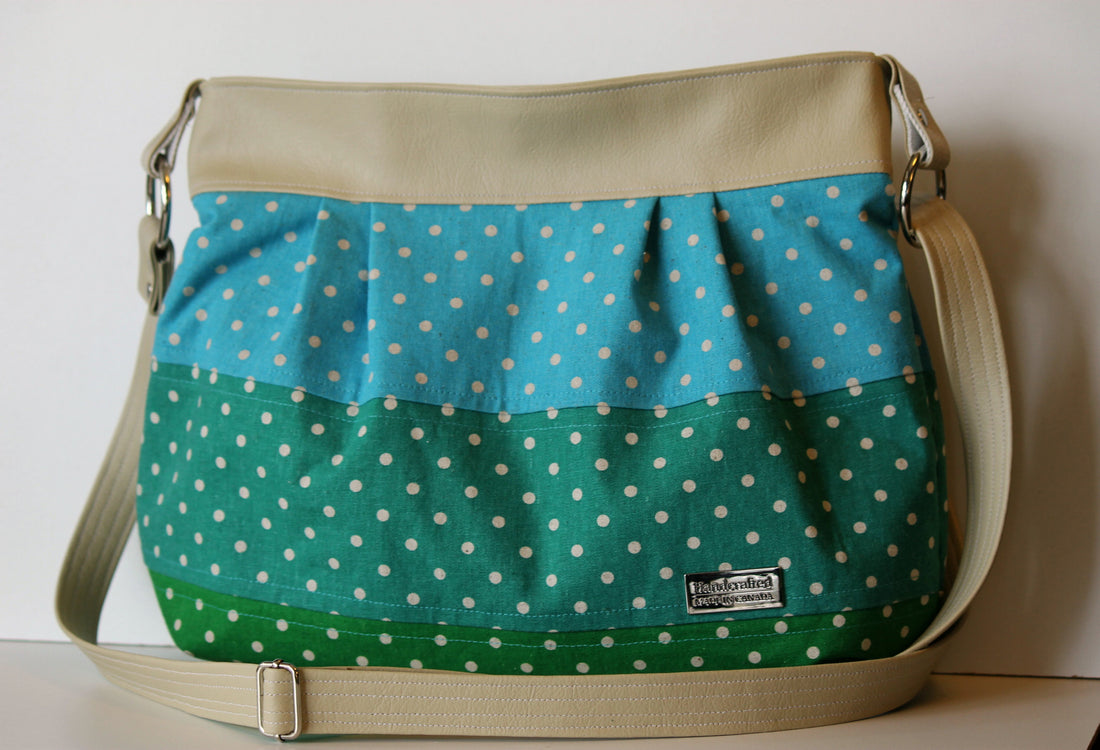
Colour Blocking & Adding a Zipper to Lily Pleated Bag
Share
This is a short and easy modification to colour block the exterior of the Lily Pleated Bag, as well as add a Zipper as a closure instead of a snap. Lily is available to purchase here: http://bluecallapatterns.com/products/the-lily-pleated-cross-body-bag-pdf-sewing-pattern
In addition to the supplies in the pattern, you will need:
-1/2 yd of extra light, or ultra light/sheer weight interfacing
-14" #3, or #5 zipper (you can also cut down a longer one)
-Matching thread for the exterior of your Lily bag

First, find your exterior Body piece A
Next, divide your piece equally into 3 parts, it's 12" high so draw lines with your ruler at 4" and 8". Mark each section with Top, Middle and Bottom. Cut Apart.
You need to add 3/8" seam allowances to the sides. You can see those in purple on my picture. I add a piece of paper underneath with a glue stick.
.
Cut your exterior fabric out
.
We need to join the pieces together. Take the top piece and lay RST with the middle piece so that the bottom edge of the top piece and the top edge of the middle piece are lined up. Sew a 3/8" seam.
Next, attach the third piece by lining up the bottom edge of the middle section (that is now sewn to the top section) with the top edge of the bottom piece RST, sew a 3/8" seam.
Next, iron the seam allowances down. and Repeat with the other 3 pieces for the exterior, BUT when you iron the seam allowances on the second set of 3 pieces make sure you iron them UP, this makes for much less bulk when you join the back and front sections of the bag.
Lay your assembled exterior pieces on top of your lightweight interfacing and use them as a pattern to cut the interfacing, and then fuse it to each piece. Next, topstitch as you please on the bag exterior sections. I chose to topstitch 1/4" on either side of both seams that join the strips together.

Your exterior panels are now ready to be sewn into a bag. Follow the pattern to finish the bag.
ADDING A ZIPPER TO LILY
It's easy to install a zipper in this bag instead of a magnetic snap. Cut out your pieces for the bag as instructed in the pattern, but OMIT the small squares of interfacing for the magnetic snap.
In addition to the lining panels and top band pieces, also cut out 2 light interfacing from the Lining Piece B and 2 light interfacing from the Top Band C, and fuse the interfacing to the fabrics. I chose to cut my top band C pieces from the same vinyl as I was using for the exterior Top band C so I did not add any interfacing to those. (you will see all 4 of them in the photos but you only need 2 for constructing the lining with the zipper, the other 2 are for the exterior) My zipper is a 14" #3 Nylon Coil, but you could easily use a longer one and cut it down, or a #5 zipper would be fine as well.
Install your interior zippered pocket as described in the pattern. I drew the rectangle for my zipper pocket opening about 1.5" under the top of the lining piece B.

With your zipper Right Side Up, line up the edge of the zipper with the upper straight edge of the lining piece B, and baste at 1/4" with your zipper foot.
Take one of your lined Top Band piece C's and place it Right Side Down on top of the zipper, and pin the "sandwich" together. Flip over and sew a 1/4" seam directly over the previous stitchline with your zipper foot.
Open up and lay flat, press the seam allowance UP, then topstitch through the TOP BAND , and zipper through the seam allowance that has been pressed UP.
Now repeat for the remaining side. It will look like this when you are done.
Continue to construct the bag as it instructs in the pattern. *** When sewing the lining front and back together, make sure the zipper is folded in half and the fold with the teeth is closest to the bottom of the bag. It's hard to get a photo of this, but here it is:
***Be sure to OPEN the zipper before you sew the lining to the exterior!
My name is Michelle. I have been sewing on a machine since my mom taught me at 6 years old. Although the things I make have changed frequently, a sewing machine has NEVER been absent from my life! I test the patterns you purchase from Blue Calla and I sell custom and Ready to Ship bags from my FB page and my Etsy Shop called Barabooboo Designs.


