
Working with waxed canvas
Over the two-week Winter break, I decided to finally try something I've meant to try for a long time now - waxing canvas. In Canada, it is nearly impossible to find waxed canvas for sale. You usually need to buy it from the U.S. and pay for shipping and quite possibly (almost certainly), custom fees.
Instead, I decided to try waxing my own canvas. I started by reading a lot of online material regarding waxing - tutorials, discussion groups, etc. I found quite a variety of information about different types of waxes, different application methods... it was overwhelming! I viewed some Youtube videos that showed different techniques for applying wax and then came up with a plan.
Step 1: FIND CANVAS
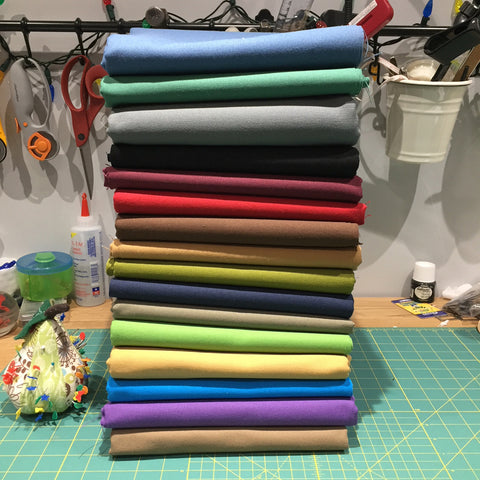
I was unable to find a good 10 ounce cotton canvas in a variety of colours in Canada. I searched for the best prices from U.S. manufacturers with the most cost-effective shipping being a priority. I had ordered from Big Duck Canvas in the past so I had a look at their website again. Now, please note that they do sell pre-waxed canvas HOWEVER, it is expensive and does not come in very many colours. I wanted PRETTY colours! I ordered 16 colours (1 yard cuts) of their 10 oz. cotton duck. They ship via UPS and they have a set brokerage fee so ordering large quantities is worth it. Total cost per yard, including shipping and brokerage fee: just under $16 CAD. Here is my beautiful canvas collection, before waxing. (do not judge my messy work bench!)
Step 2: FIND WAX
Since I would need quite a bit of wax for this much canvas, I searched for wax sold in bulk. Much to my surprise, it is very easy to find wax but I went a step further and shopped around for the best prices. I googled "Bulk candle making supplies" and found that Village Craft and Candle had some of the best prices and a huge variety of wax. Based on my research, I had decided to make a mixture of beeswax and paraffin wax. Using only one of these is not ideal, it is best to use a mixture of both. Beeswax is too brittle and paraffin doesn't smell all that great.
Products like Otterwax are very good - they only use beeswax and a secret combination of plant-based waxes and oils. However, you can only purchase small bars and that can get very expensive for large quantities of canvas. Since I don't know the secret Otterwax recipe, I decided to go for what I could find locally.
I purchased the natural, yellow beeswax and I used the 4630 container paraffin wax (this is a very soft and creamy wax that melts quickly).
(I also read that using a combination of beeswax, paraffin wax, linseed oil and turpentine is very good. However, I did NOT want flammable ingredients in my wax so I did not include them. Plus they smell terrible and I am waxing in my studio.)
You would need roughly 12 oz of wax total for 1 yard of canvas. I use 2/3 paraffin and 1/3 beeswax (8 oz paraffin, 4 oz beeswax). You could probably use more paraffin and slightly less beeswax and still achieve a nice smelling waxed canvas.
Step 3: TOOLS
You will need the following supplies:

- an old iron. Do not use your good iron. It will become covered in wax. Get an old second-hand iron or buy a cheap model for $20 on Amazon like I did.
- a slow cooker (crock pot) to melt your wax. Again, don't use your nice slow cooker. Find a cheap one second-hand or be lazy like me and buy one for $20 on Amazon. It does not need to be very big.
- a bristle paint brush. Get a nice wide one.
- old towels
- a table/surface to work on and something to protect it from the heat of the iron. I used a folding card table since I didn't want to use my nice work bench. I covered it with 2 layers of cardboard.
Step 4: APPLYING THE WAX

I've prepared a short video on the waxing process:
When you've applied your wax, you will need to let your canvas cure for 24-48 hours. I have one of those lightweight clothing racks that are perfect for the task!

Once your canvas has had a chance to cure, it's best to store it on rolls if you can. I don't have room for any more rolls (I have an enormous collection of cork and vinyl) so I've just folded mine and stored them on a shelf. If I want to remove the creases from the folds, I use a pressing cloth and iron them out. They come out very easily!
Step 5: SEWING WITH WAXED CANVAS
There are many wonderful blog posts with helpful tips for working with canvas. I asked my friend Betz if I could link to her blog post and she graciously agreed.
Betz White - Sewing with waxed canvas
I whipped up a quick tote with my new waxed canvas and I'm very pleased with the result!

19 comments
Hi Celine,
Have you tried candelilla wax? It’s used as a vegan alternative to beeswax. I was wondering if it would still be suitable for waxing canvas. What I’ve read about is that it stiffens more than beeswax and it’s recommended that if you are substituting it, you should use half the amount that you would beeswax. However, this was in reference to using it for lip balm. what are your thoughts on this? Thanks! Loved your video, looking forward to waxing my own canvas
Loved the video! It was so well done. A couple of questions. Do you use steam while ironing & what temp? Also, is there a “grade” of parrafin that you use? I know you said it was soft, but not sure what exactly to look for. Thanks again!
Thanks for the instructions. I will give this a try. Well written and the video is great.
Thanks for the instructions. I will give this a try. Well written and the video is great.
Hi Celine! Just wanted to let you know I did use the beeswax/paraffine wax/linseed oil/turpentine mix.
The linseed oil is only flammable when it dries on cloth that is crumpled up and is no longer a threat when cured. The turpentine oil smells delicious, it is not the same as white spirits! It is distilled from pinetreewax. But when it comes down town it: both mixtures work like a charm =)