

Tutorial: Adding a zippered closure to your Daisy Cross Body Bag
Although I personally prefer a magnetic snap on my own bags, I realize that many prefer zipper closures both for practical and safety reasons. My latest pattern, the Daisy Cross Body bag includes instructions for a magnetic snap closure and I decided to provide a free tutorial for a zipper closure.
Before starting this tutorial, you will need to purchase the pattern and cut out all necessary pieces. In addition, you will need the following:
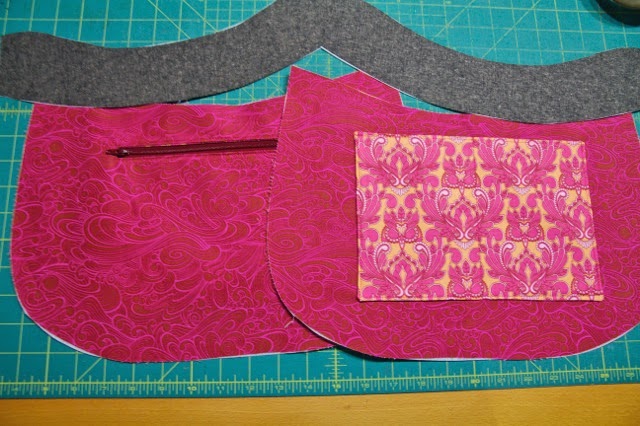
You should go through the pattern as normal but when you get to the "Lining Assembly" section, do not stitch the inner bands and lining panels together. First, start by installing your zippered pocket and your slip pockets. You should also transfer your pleat marks to the wrong sides of your lining panels before continuing with this tutorial.
To begin the zipper closure installation, prepare your zipper by adding a casing to the zipper end.
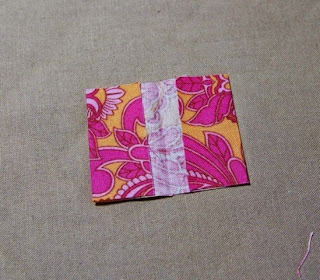
1. Start by taking your casing fabric and fold it in half vertically. Press to create a crease.

2. Open up the casing and fold in both halves about 3/4" towards the crease, wrong sides together.

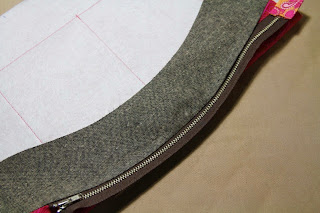
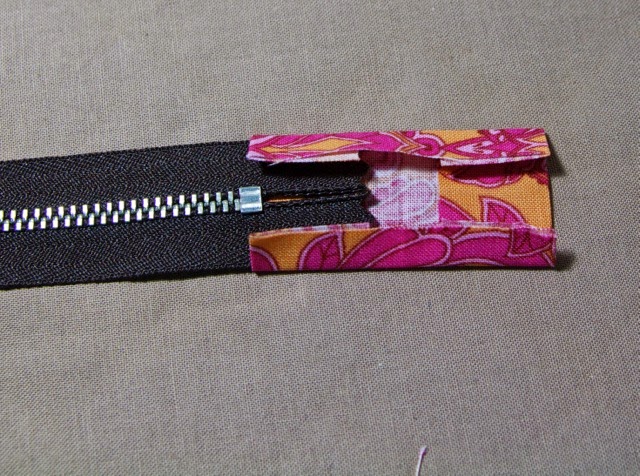
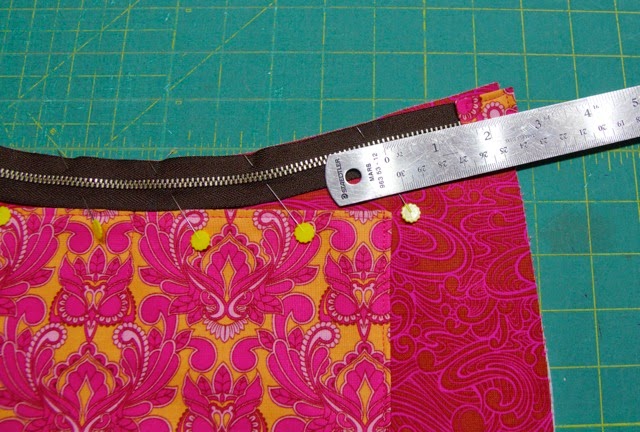
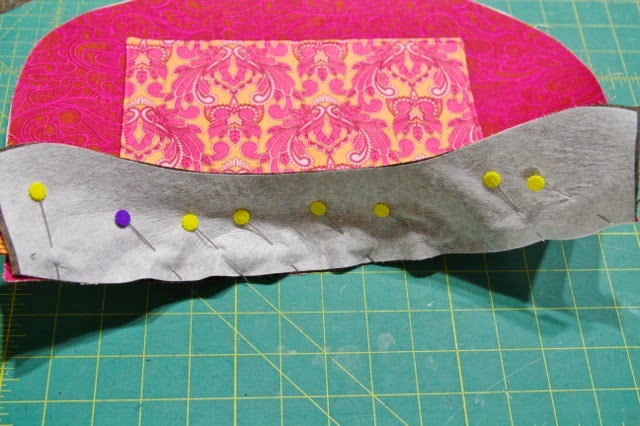
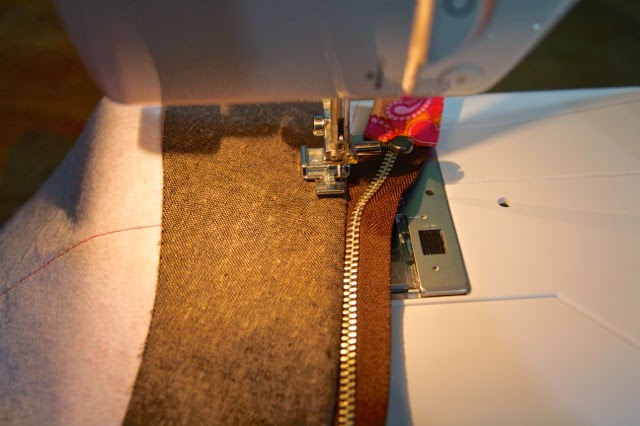
 7. Take one lining panel and pin your zipper along the top edge, both right side up. Make sure to fold under your zipper tape at the beginning of the zipper and pin in place approximately 1.5 inches from the left edge.

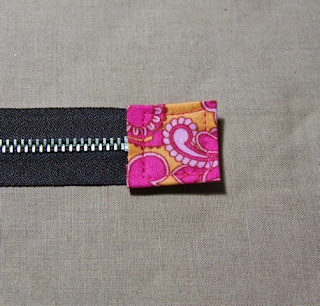
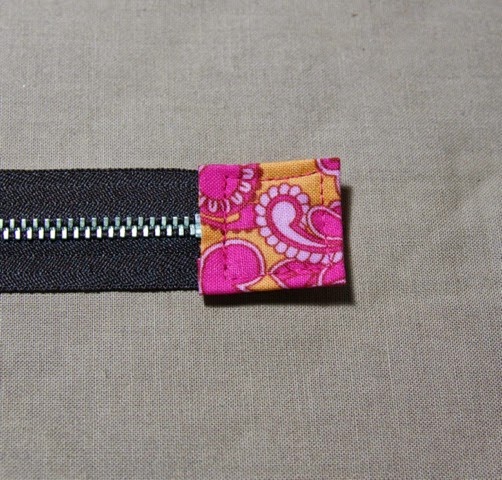
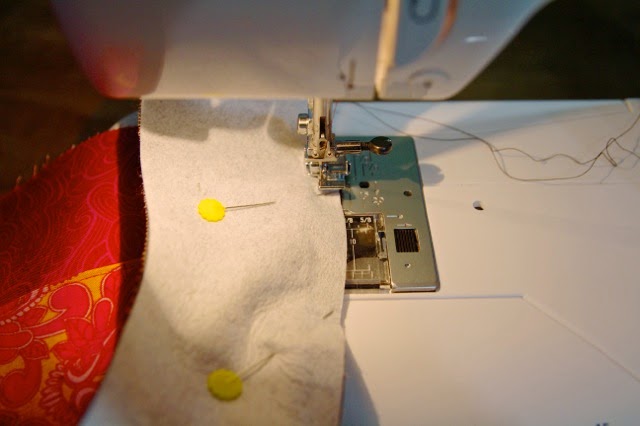
8. Do the same as the end with the zipper casing. You will want to pull your zipper away from the top edge approximately 1.5 inches from the right edge so that it will not be sewn into the seam.


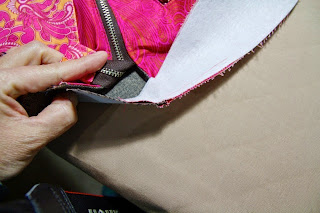 16. You should end up with a lining shell as pictured:

17. When doing your final bag assembly, everything is the same as instructed. Simply open the zipper closure as wide as it will go and insert your exterior shell inside.
Please do feel free to leave comments if you have any questions!
I would also love it if you shared your Daisy bags in my Facebook group.
Before starting this tutorial, you will need to purchase the pattern and cut out all necessary pieces. In addition, you will need the following:
- a small piece of quilt weight cotton 1.75" H x 4" W for your zipper end casing
- Cut (2) Lining Panel on fold in lightweight fusible interfacing
- 12" zipper (a longer zipper can be used and cut down)
You should go through the pattern as normal but when you get to the "Lining Assembly" section, do not stitch the inner bands and lining panels together. First, start by installing your zippered pocket and your slip pockets. You should also transfer your pleat marks to the wrong sides of your lining panels before continuing with this tutorial.
To begin the zipper closure installation, prepare your zipper by adding a casing to the zipper end.
1. Start by taking your casing fabric and fold it in half vertically. Press to create a crease.
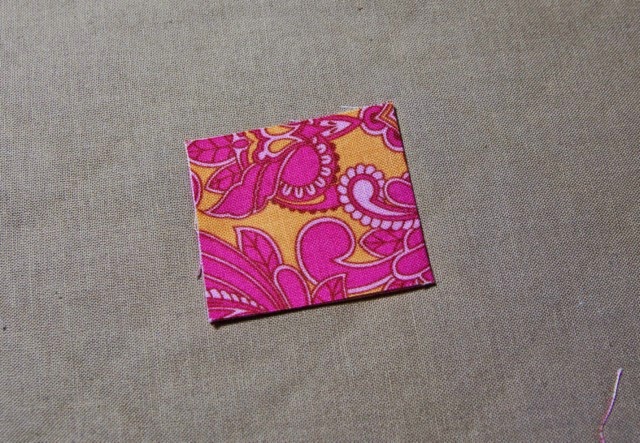
2. Open up the casing and fold in both halves about 3/4" towards the crease, wrong sides together.

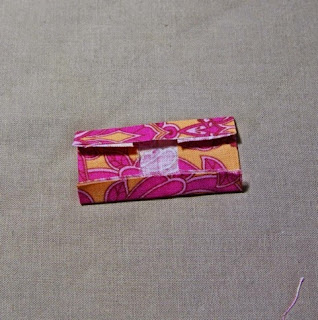
3. Now fold in the top and bottom in towards the wrong side about 1/4".
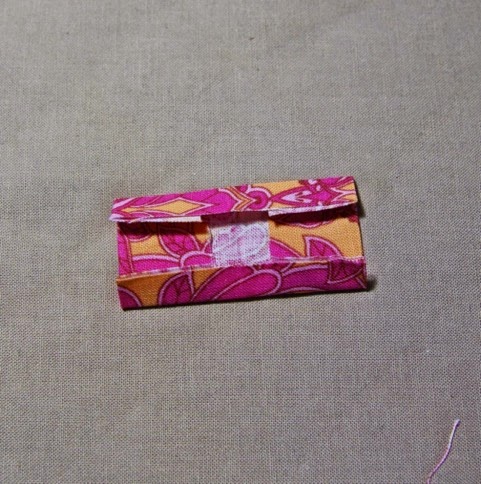
4. Slip your zipper end inside the casing and fold the casing in half along the original crease. Press and pin in place.
5. Stitch with a 1/8" seam allowance all around the edges.
6. Now take your 2 inner bands and your 2 lining panels with pockets already in place.
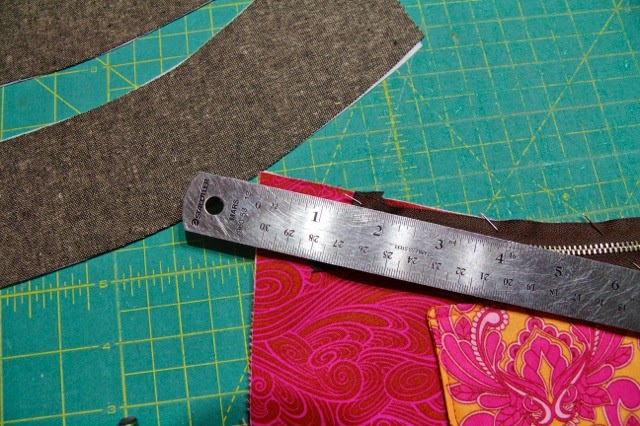
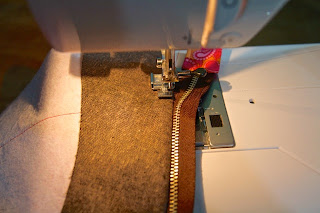
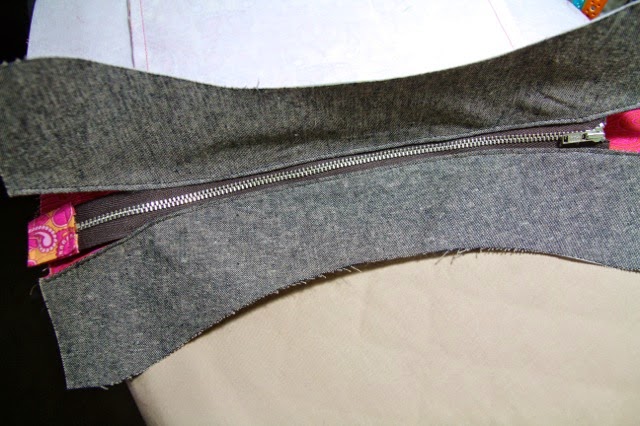
8. Do the same as the end with the zipper casing. You will want to pull your zipper away from the top edge approximately 1.5 inches from the right edge so that it will not be sewn into the seam.
 |
|||
| Zipper end being pulled away 1.5 inches from the right edge of the lining panel. |
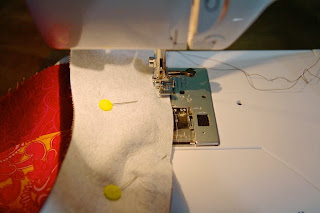
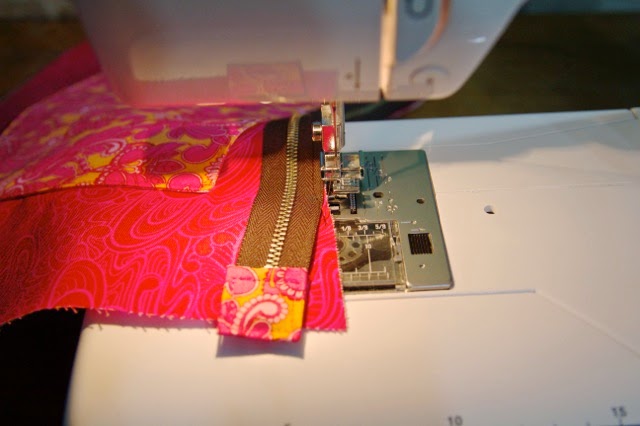
9. Now you will pin the bottom edge of the inner band to the top edge of your lining panel.
10. When stitching the band in place, again make sure you do not include the last 1.5 inches of the zipper in the seam.
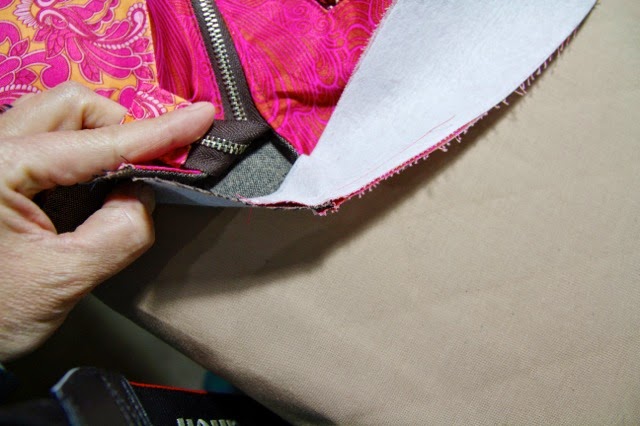
11. Notch the curves of your seam allowance.
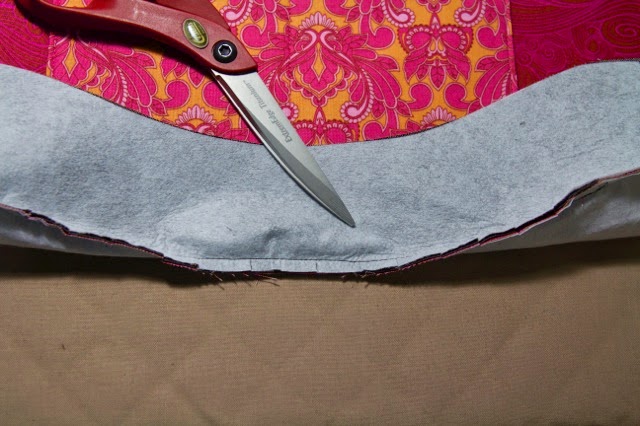
12. It is a bit tricky because of the curve of the pieces but go slowly and iron the inner band and lining panel away from the zipper. I find it easier to just press the inner band first, then flip it over and press the lining panel.
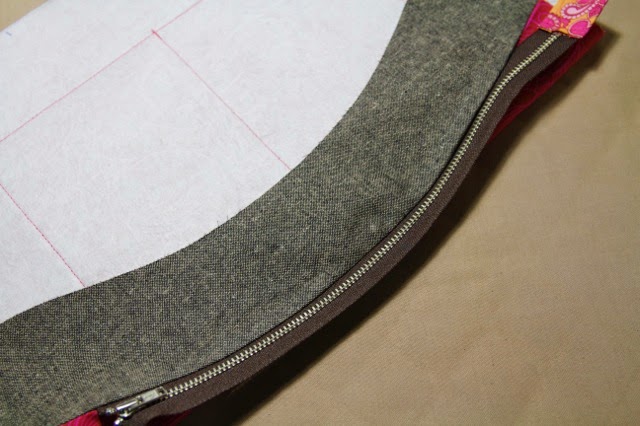
13. Topstitch the edge of the inner band.
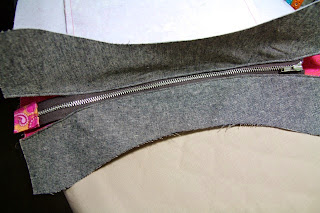
14. Repeat steps 7 to 13 for the second lining panel and inner band until you end up with this:
15. Continue with the assembly of your lining shell following the patterns instructions. The only difference is that you now have a seam to deal with between the top band and lining panel. Make sure the seam allowance is placed down towards the lining panel when attaching the gusset.

17. When doing your final bag assembly, everything is the same as instructed. Simply open the zipper closure as wide as it will go and insert your exterior shell inside.
Please do feel free to leave comments if you have any questions!
I would also love it if you shared your Daisy bags in my Facebook group.