Tutorial: Sewing a wristlet wrist strap
Share
I have seen many different ways to sew a wrist strap thoughout the years and I had an "ah-ha" moment while working on the wrist strap for my latest pattern and decided to whip up a short tutorial to share with everyone.
The great part about this wrist strap is that it does not have any exposed raw edges at all - not hidden in the D-ring, not hidden inside the strap. In this example I will be making a strap that is 1 inch wide. (You can adjust accordingly for your project - just keep in mind that you need to quadruple the amount of fabric you want so if you want a strap that is 1/2" thick, you will need to cut your fabric 2 inches high.)
For this tutorial you will need:
Create your D-ring strap piece:
Start by folding the strap piece horizontally, press to create a crease. You should now have a piece that is now 3 inches W x 2 inches H.
Open up the strap piece and fold both halves in towards the center crease. Press.
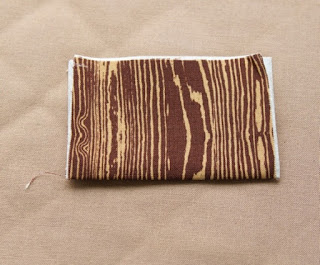
Fold in half again along original crease. Press. You should end up with a strap piece like the photo below.
Stitch along both sides of the strap piece with a 1/8" seam allowance.
Slip the strap piece through your D-ring. Fold the ends together and baste stitch together. Set aside.
Create your wrist strap:
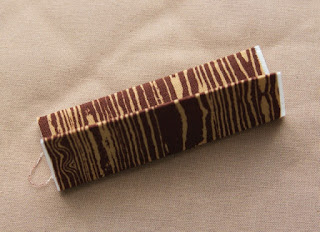
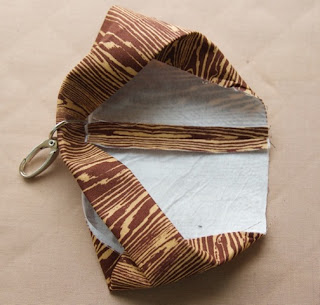
Follow the same steps as the D-ring strap piece with the wrist strap piece until you end up with a fabric casing as shown in photo below. DO NOT stitch the strap closed yet!
Take your swivel clasp and pass the wrist strap piece through the ring of the swivel clasp. Now take both shorter edges of the strap piece and open them up. Make sure you do not twist the strap piece and pin the edges right sides together.
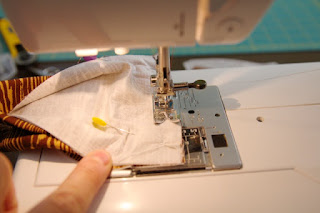
Stitch the shorter edges together.
Press the seam allowance open.
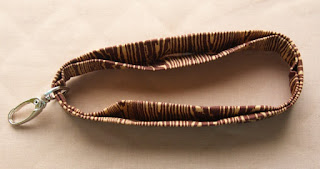
Then re-fold your wrist strap into a loop that is 4 layers thick.
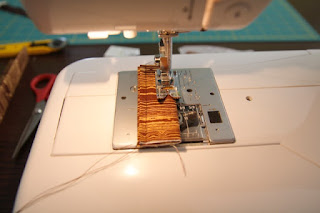
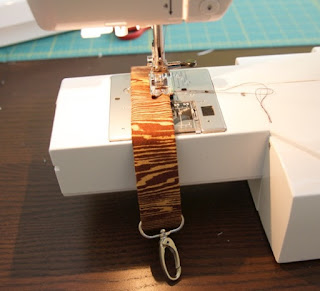
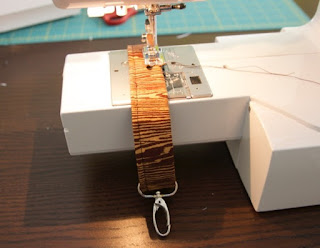
Pass the strap around the arm of your machine and stitch one edge of the strap with a 1/8" seam allowance making sure you are pushing the swivel clasp out of the way as you sew. Make sure to backstitch at the end.
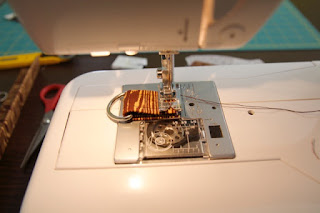
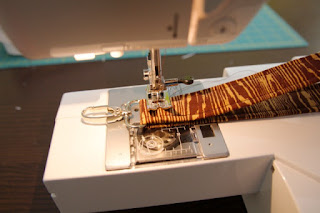
Stitch the other edge of the strap with a 1/8" seam allowance again sliding the swivel clasp down as you sew.
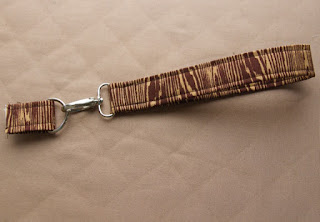
Now find the joining seam and place it close to the swivel clasp's ring but not inside (it will be too bulky because of the seam). Stitch right on that seam (I stitched a square pattern on my strap) to close the loop and stitch your swivel clasp in place.
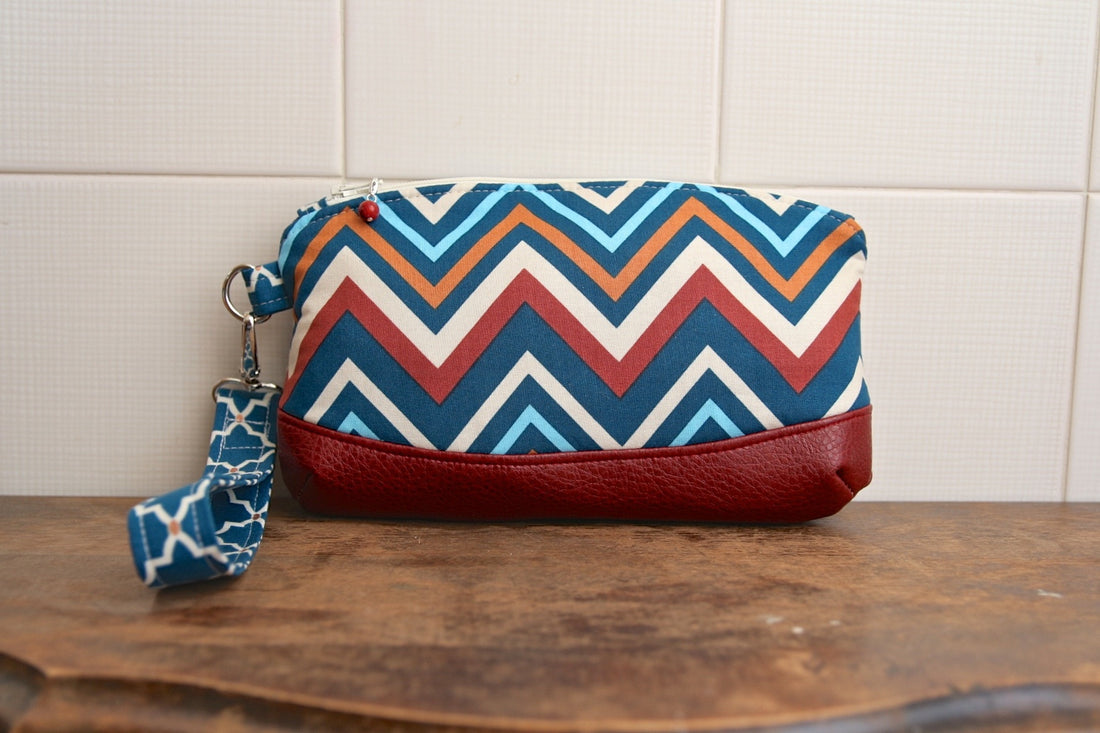
You're done! Now you just need to attach your D-ring strap to your project.
The great part about this wrist strap is that it does not have any exposed raw edges at all - not hidden in the D-ring, not hidden inside the strap. In this example I will be making a strap that is 1 inch wide. (You can adjust accordingly for your project - just keep in mind that you need to quadruple the amount of fabric you want so if you want a strap that is 1/2" thick, you will need to cut your fabric 2 inches high.)
For this tutorial you will need:
- (1) D-ring strap fabric 3 inches W x 4 inches H
- (1) piece lightweight fusible interfacing 3 inches W x 4 inches H
- (1) Wrist strap fabric 15 inches W x 4 inches H
- (1) piece lightweight fusible interfacing 15 inches W x 4 inches H
- (1) 1" D-ring
- (1) 1" Swivel clasp
Create your D-ring strap piece:
Start by folding the strap piece horizontally, press to create a crease. You should now have a piece that is now 3 inches W x 2 inches H.
Open up the strap piece and fold both halves in towards the center crease. Press.
Fold in half again along original crease. Press. You should end up with a strap piece like the photo below.
Stitch along both sides of the strap piece with a 1/8" seam allowance.
Slip the strap piece through your D-ring. Fold the ends together and baste stitch together. Set aside.
Create your wrist strap:
Follow the same steps as the D-ring strap piece with the wrist strap piece until you end up with a fabric casing as shown in photo below. DO NOT stitch the strap closed yet!
Take your swivel clasp and pass the wrist strap piece through the ring of the swivel clasp. Now take both shorter edges of the strap piece and open them up. Make sure you do not twist the strap piece and pin the edges right sides together.
Stitch the shorter edges together.
Press the seam allowance open.
Then re-fold your wrist strap into a loop that is 4 layers thick.
Pass the strap around the arm of your machine and stitch one edge of the strap with a 1/8" seam allowance making sure you are pushing the swivel clasp out of the way as you sew. Make sure to backstitch at the end.
Stitch the other edge of the strap with a 1/8" seam allowance again sliding the swivel clasp down as you sew.
Now find the joining seam and place it close to the swivel clasp's ring but not inside (it will be too bulky because of the seam). Stitch right on that seam (I stitched a square pattern on my strap) to close the loop and stitch your swivel clasp in place.
You're done! Now you just need to attach your D-ring strap to your project.

