
I've just released my latest pattern, the Delphinium Hobo bag. The shoulder strap for this bag has 2 swivels, one at each end. These swivels are attached to gate rings which have been inserted into 2 grommets at each end of the bag.
If you're not comfortable setting grommets or you simply don't have grommets on hand, then this tutorial is for you!
First, you will need to purchase the pattern and read through the entire document before starting.
Changes to Notions and Supplies
You will not need:
- the grommets
- the gate rings
Instead, you will need:
(4) 1" O-rings or D-rings***

*** Please note: you must make sure that your swivels are large enough to clip onto 2 of your O-rings or D-rings
Additions to Cutting section
In addition to all of the pieces outlined in the cutting chart on page 3 of the pattern, you will also need:

STRAP CONNECTORS:
Cut (4) 2" W x 3" H from Cork/Vinyl or Fabric
If using fabric for your STRAP CONNECTORS, you must also cut:
(4) 2" W x 3" H from fusible woven interfacing
Let's get started!
Follow the pattern instructions until you get to step 36. After step 36, complete the following steps:

1) Draw a line through the centre of the strap piece (along the 3" side) on the WS.
2) If you are making fabric connectors, you can press each half of the strap connector in towards the centre line, WST. Topstitch along both longer sides with 1/8" seam allowance.
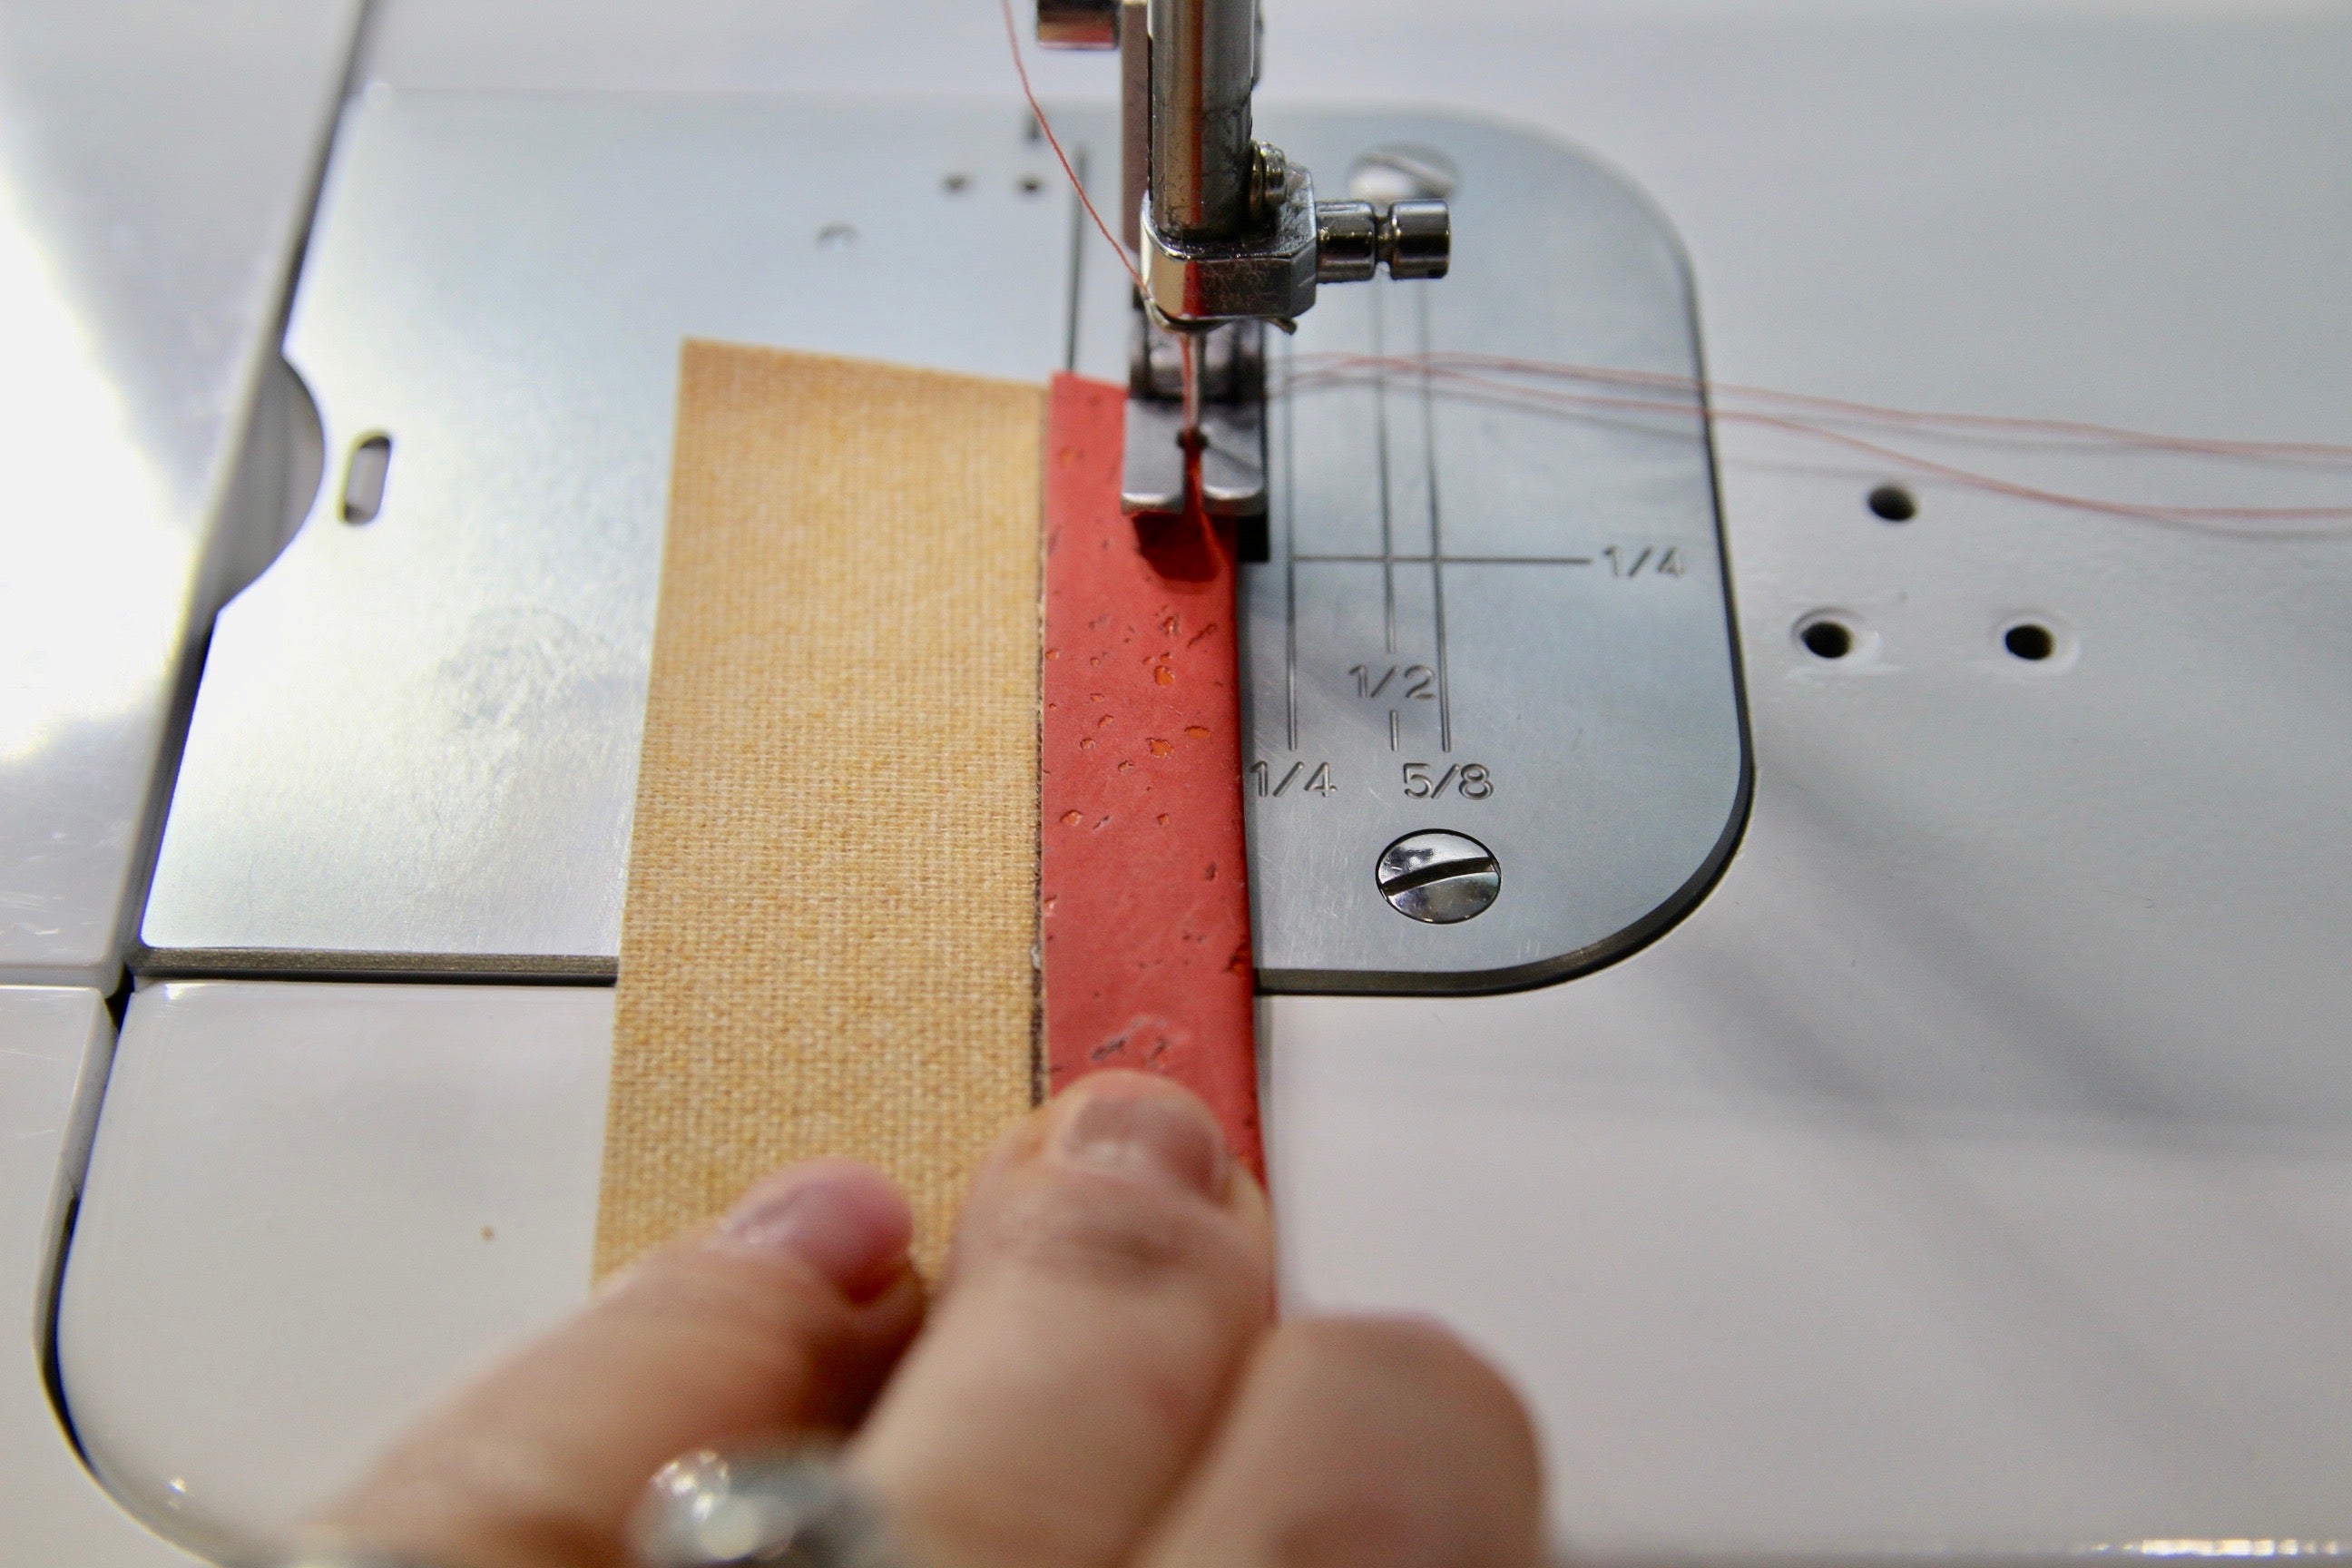


3) If making cork or vinyl connectors, you will need to fold each half of the strap as you are sewing the outer edges with 1/8" seam allowance.
Repeat for remaining connectors. Your connectors should measure 1" W x 3" L.

4) Slip a STRAP CONNECTOR through one of your rings and fold in half with the centre seam hidden between the layers. Baste the raw ends together.

5) Take your assembled exterior shell. Measure 1/2" from the side seam on the gusset's side and make a mark along the top edge.

6) Baste a strap connector on the outside of each mark with 1/4" seam allowance from the top edge. Your strap connectors should be basted with the strap portion sticking out the top edge about 1/2".
Continue with the rest of the pattern, omitting steps 56-60.

You're done!