
Hey everyone! Are you excited? We’re going to make our lining and finish our Aster Handbag today!
We’ll begin at Step 50 in the pattern, we’re going to fold our pocket pieces in half, press, and top stitch along the fold. Once both pieces are stitched, we’ll put both pockets on each of your lining body pieces making sure to align the raw bottom edges of your pockets with the body pieces. Once those are pinned in place, sew around the raw edges of the pocket to secure to the body panel piece.

Now that those are attached, fold your panels in half wrong sides together and mark your centres. We’re going to sew up the middle to create two divided pockets.

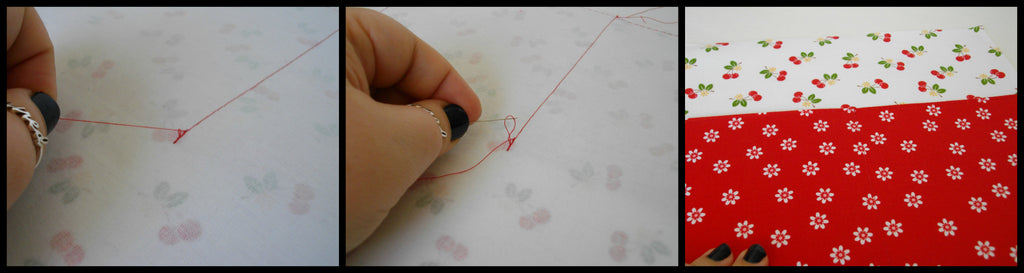
Remember how we were hiding our threads on the outside parts of the bag? Well, I do it inside too, especially on slip pockets, I sew from the bottom raw edge to the top of the slip pocket and this time I do back stitch. I pull my bobbin thread on the back to get that little loop, and then pull up on the loop, and voila! No threads to try and snip close and everything is tidy on the front! Since you backstitched you don’t have to worry about tying these ones off.
Set those aside for a moment because now we’re going to prepare our zippered pocket. First off we’re going to fold and press the bottoms of our pockets up 3/8”, this will give us a nice finished edge to sew when after we turn our bag later on. I like to draw a line and press, that way I know I’m getting it nice and straight.

Place one zippered pocket piece on your lining piece with the slip pockets we just completed. The top edge of your zippered pocket piece should be 1 ½” below the top edge of your lining panel piece pin in place making sure it is centred. Draw a rectangle that is 8” W x 3/8” H on the wrong side of the zippered pocket lining piece that is centered, 1” below the top edge of the zippered pocket lining piece. Sew all the way around the rectangle you drew, I like to use a short stitch for this (2.2), I find I get neater corners when it’s turned the smaller the stitch. Once you’ve sewn your rectangle draw a line down the middle. I like to make an X a half inch from each end. Cut along your horizontal line and the triangles at the ends; be sure not to clip any stitching in the corners!
 Flip your pocket piece through the opening and carefully iron the edges and corners making sure not to get any puckers. Next, pin or glue your zipper right side up inside the rectangle opening; sew around the rectangle with a 1/8” seam allowance.
 Now pin your other zippered pocket piece to the attached piece, and sew them together making sure to leave the bottom open, we’re going to turn our bag through the pocket in just a bit. Oh, and unzip your pocket zipper now, you don’t want to forget that. Trust me.
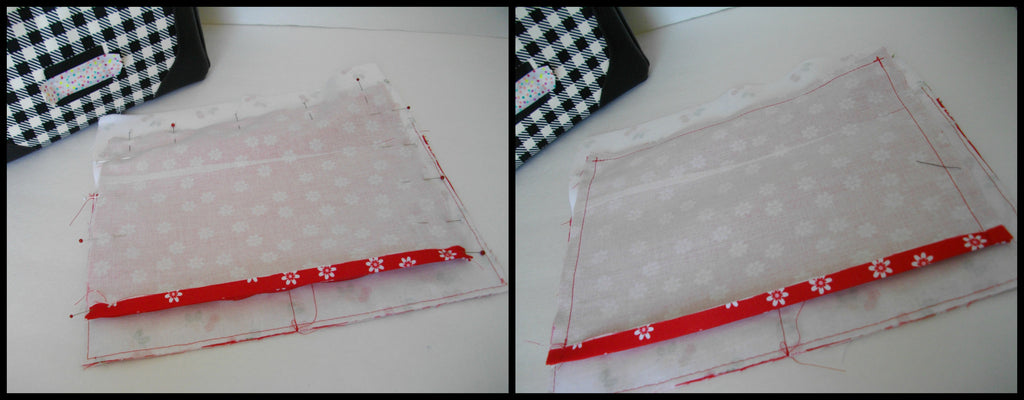
Now we’re going to assemble the interior pieces exactly as we did for the exterior yesterday, making sure to leave 3/8” at the start and end of your seams when attaching to the bottom!
 Insert your exterior shell into the lining shell, right sides together and clip all the way around the top edges making sure to line up your side seams – I always clip those first then make my way around the bag. Sew together along the top edge.

Now, take a deep breath. We’re going to turn the bag right side out through the pocket. Just take your time, it works beautifully I promise. Once you get all your corners popped out and everything is lined up where it’s supposed to be, pin your zippered pocket pieces together and stitch the opening closed.

Now tuck your lining inside making sure it’s all sitting where it needs to be and top stitch around the edge of the bag. Your top panels should be facing outward when top stitching. Don’t forget to increase your stitch length if you did earlier on. Also, I like to pin my lining down, my machine doesn’t have a large throat space and the lining can get twisted on me, so you do what works best for you.

We’re almost there! Next up are the straps. Per the instructions, draw a line down the centre, and attach your double sided tape, then fold over the raw edges to the centre, and fold in half again to the centre and clip together. Sew around all 4 edges with a 1/8” seam allowance.
Now we’ll attach our shoulder straps to the bag, I used rivets on mine and made marks 1” from the rectangle rings for this. Attach your rivets per manufacturer instructions.

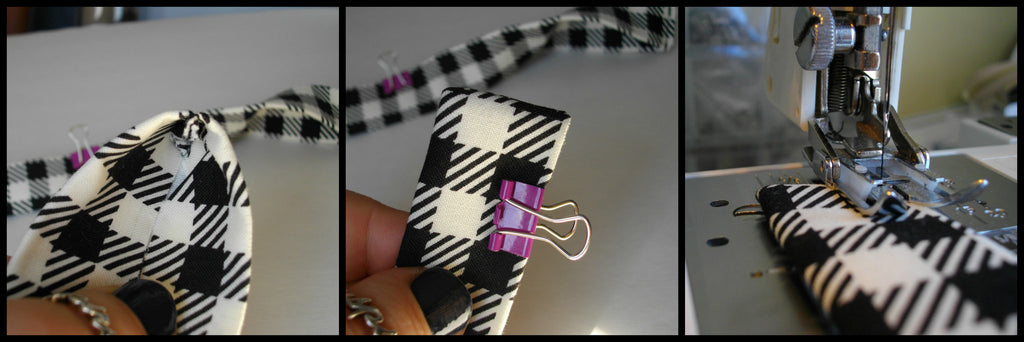
Now we’re going to make our cross body strap. I do this part is a little different from the pattern, feel free to follow along the pattern if you prefer, I’m going to show you another trick for the ends of your strap so they aren’t too bulky for stitching later.
First fold over and press your strap meeting raw edges in the centre, and then fold in half again and press well. Now take your nicely folded strap, and fold your outside pieces right sides together. Stitch along that raw edge at 1/4”, do the same to the other end. Taper the corners slightly, and then flip your strap so the right sides are facing out.

Your inside will look like the image below. Now clip or pin along the long open folded edge and top stitch at 1/8”all the way around.
Slip one end of your strap through your slide and wrap the strap end around the middle bar and sew it onto itself. I like to sew a square to properly secure the strap. Pass the opposite end of your strap through one swivel clasp’s D-ring, then back through your slide and then wrap that same end around the D-ring of the 2nd swivel clasp and sew the strap in place. Clip your swivel clasps to the D-rings on each side of the bag.

Now step back and admire your beautiful bag! You did a fantastic job! Now please don’t forget to share your bag on Instagram tag @bluecallapatterns and include the hashtag #AsterSewAlong, or post in the Blue Calla Patterns Facebook group to be entered to win a prize!
Deadline for submissions is Sunday May 14th. Winners will be chosen randomly from all submissions. To see the prizes up for grabs, you can visit our announcement post here.
