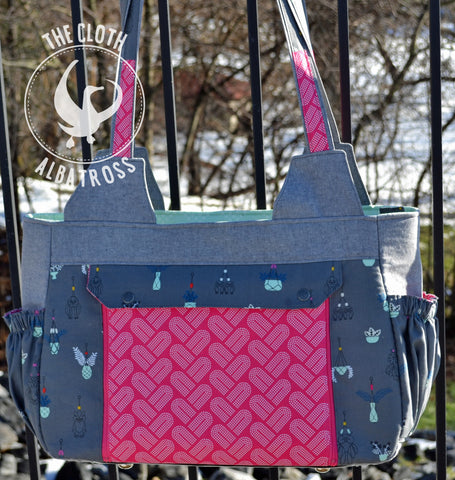
Foxglove Pattern Instruction Alterations

Let’s start by figuring out which portions of the Foxglove pattern that we need to alter and make notes on. The construction of the bag will be exactly the same except for the exterior main panel; you will follow the instructions for constructing the gusset, lining, and back exterior main panel.
Print pages 2-3, 5-10, 12-19 (Pages 12-19 you do not need to make any notes on, so it’s not necessary to print them unless you like having the hard copy for reference.)
Download revised EXTERIOR PANEL A
Changes to Supplies:
Under notions, omit 16” zipper.
You will also need:
- 1 yard Fabric for changing mat
- 24” x 20” piece of batting OR sew-in Thermolam (fleece)
- 3” x 13” piece of fusible Thermolam Plus (fusible fleece)
- 12” W x 8” H Lightweight Mesh
- (2) 9” Zippers. (Zippers are measured by the length of their teeth, not tape, so the total length of your zippers will actually be 10”.)
- 12” of 1 ¼” wide Bias (double-fold: finished width is just over 1/4”)
- 74” of 2 ¼” wide Bias strip (single-fold: finished width is 1 1/8”)
- 2 sets of heavy duty snaps (for flap)
- 2 sets of plastic snaps (for attaching changing mat to pocket)
- Walking Foot
- 505 Basting Spray (optional)
Changes to Cutting Instructions:
On page 3, omit mat straps and zipper tabs. Make the following changes to exterior panel A cut
instructions*
*You will only be making one pleated pocket and it will be on the back exterior panel.
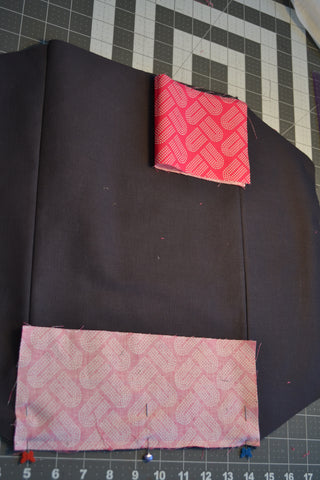
For the front exterior panel cut the following:
- Center Panel: 12” W x 11” H (1) exterior fabric (piece behind zippered pocket with mesh attached)
- Pattern Piece (Side Panel)*: (1 set) of mirror images of in exterior fabric and SF101 (You will have 2 exterior fabric pieces and 2 pieces of SF101.)
- Zippered Pocket Pieces: 11 ¼” W x 10” H– (1) exterior fabric , (1) lining fabric, and (2) SF101
- Flap: 13” W x 3” H – (1) exterior fabric, (1) lining fabric, (2) SF101, (1) fusible fleece
For the removable changing mat cut the following:
-
Front Main Fabric: (1) 10” x Width of Fabric and subcut* the following from that strip:
- (1) 16” W x 10” H
- (2) 16 ½” W x 5” H
- Front Accent Fabric: (2) 9 ½” W x 4 ¼” H
- Snap Tabs: 10” W x 2 ¾” H (1) lining fabric, (1) backing fabric, (2) SF101
- Backing: (1) 20”W x 24” H
- Batting OR Sew-In Thermolam (fleece): (1) 20” W x 24” H
*When cutting based on measurements, I find it easier and more efficient to cut a strip the width of the fabric and then sub cut it into the sizes that I need. If it’s more effective to use your fabric by just cutting out the rectangles, just pay attention to the set of measurements and disregard cutting the 10” WOF strip.
Changes to Instructions
The first page of instructions in the Foxglove pattern is for the mat strap, which you will not need for the diaper bag. So skip over that page and start with attaching your straps to the strap holders.
Under exterior assembly, you will not need to use the mat cut out, unless you want a dip in your side panels for aesthetics.
After installing the purse feet, you will begin pleating panels. BUT you only need to do 1 pleated panel – the back exterior panel. Do not do anything with the front exterior for now. Continue following the instructions for finishing the back exterior panel.
On page 10, where you see the 16” zipper picture, stop following instructions there, as that is for front exterior panel assembly.
Begin following instructions again under “Interior Assembly” on page 13. Construction of the lining will be exactly the same unless you do not want the mat cut outs in the top of the sides.
Front Exterior Main Panel Tutorial
I am saving the changing mat portion of the tutorial until the end because you can finish the entire bag without having the changing mat completed, since it’s completely removable.
Flap
If you haven't interfaced your 13" x 3" exterior and lining fabric pieces, do so now. I waited to fuse the fleece to mine so that I could keep it out of the seam allowances but if you don't mind fleece in your seam allowance (SA), you can fuse that now as well.
Place your interfaced flap pieces on your cutting mat and mark 1.25" in from the bottom corners and in from each bottom edge. You will connect those marks with a line and cut off the squared corners so that you're left with diagonal corners.
After you've cut the bottom corners off of both flap pieces, use the lining piece as a guide to cut your fleece. Trim 1/4" off the 3 bottom edges and 3/8" off of the top straight edge.
Sew the 3 bottom edges of the flap with a 1/4" SA. Leave the top straight edge open.

Trim the corners of your flap, turn right side out, and topstitch the 3 bottom edges. Baste the top straight edge closed.

Center Panel
Let's start with the center panel that's behind the zippered pocket. I didn't interface my center rectangle because it's behind the pocket and it's eventually going to be basted to foam. But you can interface yours if it makes you happy. Place your 12"W x 11" H center panel, mesh, and 1/4 double-fold bias tape in front of you.

I labeled the top corner of my center panel, since the width and height are similar, I didn't want to get confused.
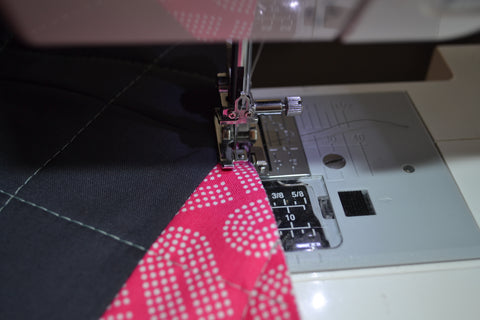
Insert the top edge of the mesh into the bias tape.
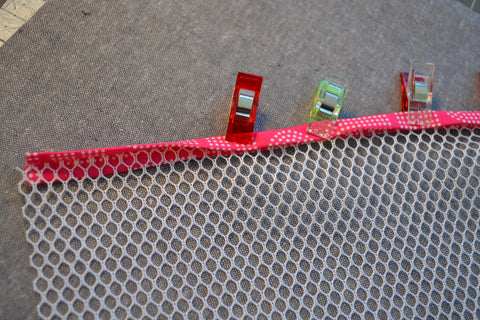
Topstitch along the edge of the bias tape, making sure that your bias on the back is even with the front. I recommend using a walking foot in this step since bias tape and mesh are both stretchy, you don't want it to get distorted and pulled by your presser foot.
After you've attached your bias trim, baste the mesh to your center panel along the 3 bottom edges.

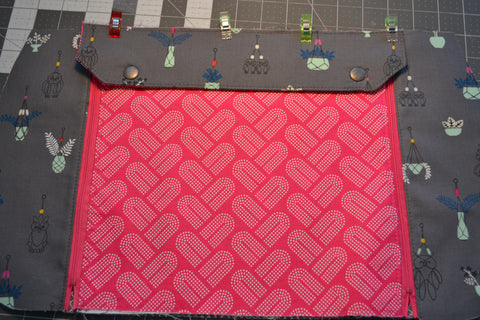
Zippered Pocket and Side Panel Pieces
Set your center panel aside and we're moving along to the scary part - zippers. Get your (2) 9" zippers. Make sure the total tape length is 10". Baste the top edges of the tape to itself at a 45º angle.

Get your (2) zippered pocket pieces (11.25"W x 10"H). If they're not already interfaced, do so now. Lay your exterior pocket piece right side up and place a zipper face down on the left edge of your pocket piece, matching edges.
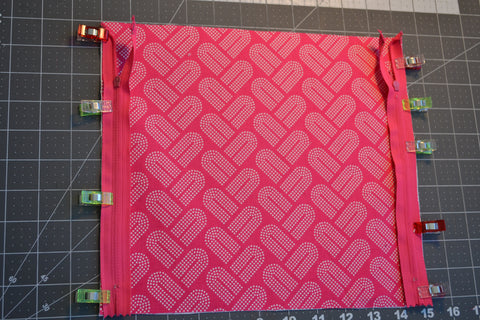
Place the other zipper face down along the right side, aligning edges. Baste both zippers in place using an 1/8" SA.
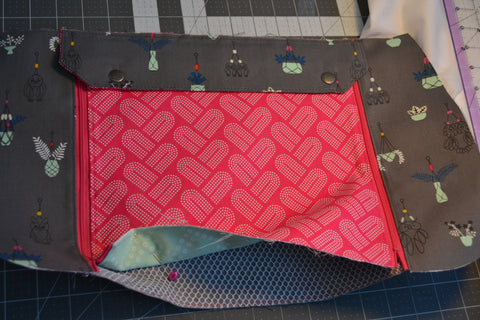
After your zippers are basted to the exterior pocket piece, we're going to sandwich them between the lining piece and exterior piece. Lay your lining piece RST with the exterior piece. The interfaced back of the lining should be facing you.

Mark a 1/4" down and in from the top 2 corners. These marks will show your where to pivot when you sew along the side, top edge, and down the other side. The bottom edge will be left open.


I know that you're dying to trim those top corners. DON'T. Or if you must, at least use Fray Check. But I really don't want you to. The zippers will fray and get weak in your seam. Yes, you won't have sharp corners but that's okay because they will flow with the zipper anyway. Are you okay with the corners now since they flow?
Before turning, press the top seam open. Turn right side out. Poke your corners out with a dull tool. I use a metal chopstick.

Topstich around the sides and top edge. Bast the bottom edge closed.
Get 2 FEMALE snap heavy duty snap halves. You'll notice in the picture that there are male snap halves being installed. I'm not sure who did that. Anyway, mark your snap placement 1" in from the fabric edge and 3/4" down from the top. I say fabric edge because I didn't want you to include the zipper tape in your measurement. I just use the little tool set that came with my snaps to install them and a hammer. The instructions that come with them are minimal and I'm by no means a snap expert (see male snaps installed where female snaps should be) but I've found them a bit easier to install if I mark the placement of all 5 prongs and then use my seam ripper to poke starter holes. Hit them with a bit of Fray Check, and then I put the pieces together and use the hammer and setter to set them.

After the 2 female snaps are installed, we're going to get back to our zippers. Get your 2 side panels that you cut with the pattern piece. If they're not already interfaced, so that now. Place your pocket panel face down onto the straight edge of the side panel. The front of the zipper should be against the right side of the side panel piece.
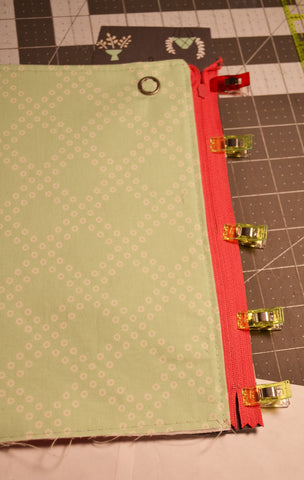
Baste the zipper in place using an 1/8" SA. Repeat with the other zipper and side panel.
After both side panels are basted on, lay your center panel face up, and then lay the zippered panel on top of it. Align the edges of the center panel withe the edges of the zippers and side panels. The zippers should be sandwiched in between the side panels and center panel. Sew along each side with a 1/4" SA.

Topstitch on the side panel 1/8" from the zipper edge.

Retrieve your flap. Fold the flap in half and finger press to mark the center. Find the center of the top edge of your main panel the same way. Clip or pin the flap, centered, to the top straight edge of your main panel.
Mark your snap placement by finding where the center of your snaps hit the flap. Mine were ~5/8" in from the bottom edge and ~1" in from the corner.
Unclip your flap and install the FEMALE portion of your heavy duty snaps where you marked the flap. After the snaps are installed, center the flap and baste it to the main panel.
The bottom edge of your pocket should remain open because we'll still need to put our snap tab in there for the changing mat.
Get your front exterior band D piece and sew it to the top straight edge of your main panel with a 3/8" SA. The flap will be sandwiched in between the top band and the main panel. Press seam towards the top panel. Do NOT topstitch yet.

After you've sewn your top trim to the main panel, use it as a pattern piece to cut out your foam.

Pin the main panel to your foam and baste around all the edges with a 1/4" SA. Now you can topstitch the seam along the top panel.

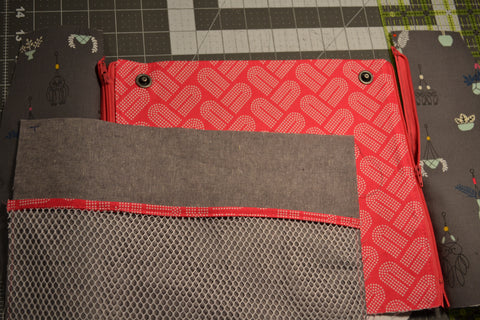
Your main panel is almost done! Whoohoo. We just need to make the snap tab that the changing mat attaches to.
Snap Tabs
Get your snap tab pieces (10"W x 2.75"H). One of the snap tabs will be inside of your zippered pocket and the other will be against the backing of your changing mat. I based my fabric choices on that.
If your snap tab fabric is not interfaced, do so now.
Fold your snap tab in half, bringing the short ends together. In the picture below, the right side is a folded edge. Using a 1/4" SA, sew the left side and top side. Leave the bottom edge open.
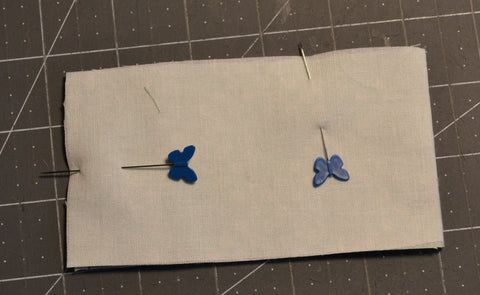

Clip your corners and repeat with other snap tab.

Get your 2 sets of plastic snaps. (I use a pair of Dritz pliers to set my plastic snaps.)

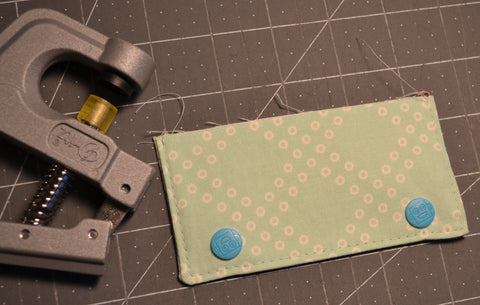
Set your snaps 3/4" in from the side and 1/2" in from the bottom edge. If you would prefer a bit different placement, just make sure your snaps are set in the same location on each tab.
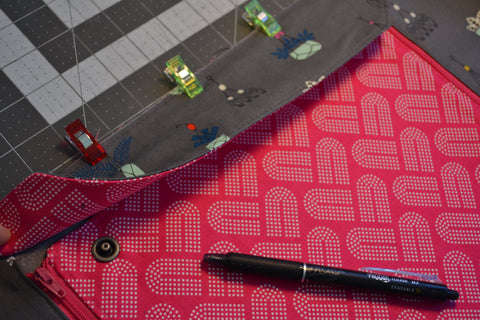
Take the snap tab that you want inside the zippered pocket and fold in half, finger pressing to find the center. Take your main panel and mark its center. Clip the snap tab (snap side up) to the main panel. Baste the snap tab onto the pocket.

Now that your snap tab is attached, you can baste the pocket edge closed.

You can now completely finish your Foxglove bag. We still need to make the changing mat but its construction does not affect the completion of the bag itself.


Changing Mat
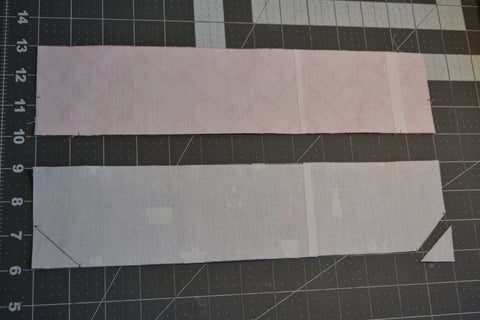
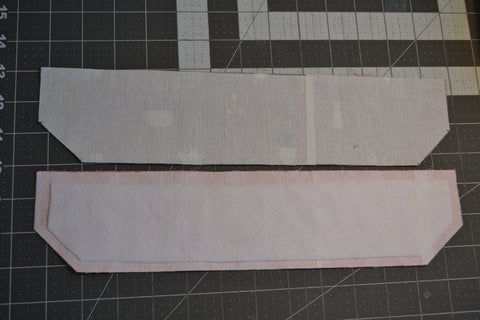
Get your front main fabric pieces. You should have (2) 16.5" x 5" pieces and (1) 16" x 10" piece. Take your (2) 16.5" x 5" pieces and mark 2.5" in from the short edges. Draw a line from the 2.5" mark to the bottom corner. Cut on the line. Repeat for other edge and other piece.

Since we're binding the edges, it's easier to have all curved edges and no corners. That way the bias can just curve around. Otherwise, you have to miter the corners of the bias. So you'll probably be annoyed with me for this but I want you to trim the corner so that it's rounded. Round the corner where your 2.5" mark was with the edge of a thread spool. You're only cutting off a little sliver. Just enough so that it's a curve and not a corner. You can weigh whether mitering or rounding your corners is more annoying. Repeat this with the other 16.5" x 5" piece.
Get your 16" x 10" piece. Fold the long edge in half and finger press to find the center. Find the center of the 16.5" edge of the pieces that you just curved the edges on. Center the 16.5" pieces on the 16" edges. You should have a 1/4" overlap on each end. Sew together with a 1/4" SA. I didn't take a picture of this step and the way I've just explained it sounds confusing, but here is a picture of the backside with the seams pressed open, so hopefully you can tell what I was rambling on about.

After the sides are attached to the mat's center, get your (2) accent pieces (9.5"W x 4.25"H). Bring the short ends together and finger press to find their centers. Pin RST with the top and bottom of the mat's main fabric.
Sew the accents on with a 1/4" SA.
Mark the top center of the accent pieces and a line connecting it to each bottom corner of the accent piece. Cut on the line. The accent pieces should now be triangular.

Get your thread spool! Curve that itty bitty point. Repeat for other accent point.
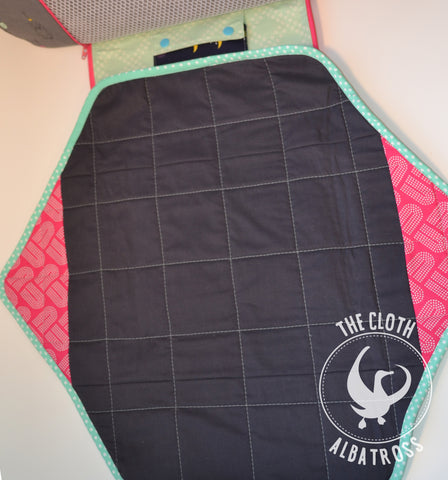
You're done with the front of your mat. Now we'll use it as our pattern piece for the backing fabric, and for the fleece (or batting). Pin the mat front to backing and cut out your backing. Repeat with your fleece.
Now we're going to make a quilt sandwich. Place your backing fabric wrong side up on a flat surface. Make sure to smooth out any wrinkles. Lay your fleece on top of the backing. now fold the fleece halfway down back on itself. The reason that we're doing this is that it's easier to baste half of your batting and smooth it out rather than trying to place the entire piece down at once. Spray the visible half of your fleece with basting spray. (If you don't have any spray, that's okay. Just use pins.) You only need a bit of spray. Lay the fleece back down onto the backing. Use your hand and smooth from the center outward. Once that half of the fleece is basted to your backing, repeat with the other side of the fleece. You'll notice in the picture below that my fleece has stitch lines in it. I did some dense stitching on mine to help with folding the mat once it's in the pocket but I don't really think it made any difference, so I left that step out. I thought that we had gotten up to quite a few steps already. Also, don't spray on top of your cutting mat. Who would do that?

Now that your fleece is basted to your backing, lay your finished mat top onto the fleece. The mat top will be right side up, with the wrong side against the fleece. Pull one half of the mat top down and spray the exposed fleece with basting spray. Smooth the folded mat top back down onto the fleece. Repeat with the other half.

Now your mat is spray basted. I liked to baste with a few pins as well. There's nothing more annoying than making pretty quilting lines on your top and then turning it over to see that you have a bunched spot in your backing. So I like to take my time basting so that I spend less time with my seam ripper. I have some quilting safety pin things that are curved so that they're easier to pull back up through the layers. But they're not necessary. You can use regular safety pins or regular pins if you like to poke yourself.

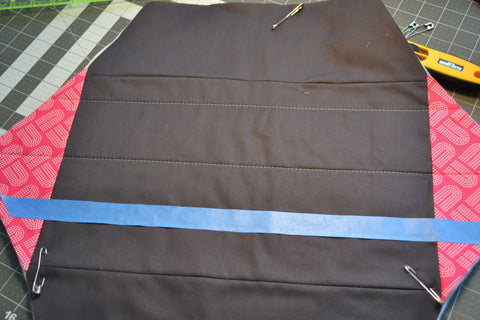
Now we're going to make our quilting lines. Decide how you want to quilt yours. I just did sparse straight line quilting. But you could get fancy if you wanted. Whatever quilting you decide on, don't start at the edge, begin in the center. That way your project doesn't shift. Speaking of shifting, make sure you use your walking foot and lengthen your stitches. (I use a 3.5 mm stitch length for my quilting lines. )
For straight line quilting, I like to keep my lines straight by using painter's tape as a guide. I just use the same piece until it gets unsticky.
When you're finished with all of your quilting lines. Stand back and revel in them for a moment.


This next step is optional and please don't tell the quilting police on me, but I like to enclose my edges with my overlock foot before binding. If you don't want to zigzag stitch your edges, skip on to the binding portion.
I used a zigzag stitch on my machine and an overlock foot. I enclosed the edges around the entire mat.


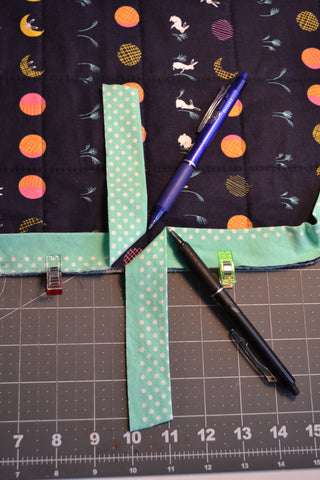
Now we're going to attach our binding. Place your mat so that the backing is facing up. Align the raw edges of the binding with the edge of the mat. Start clipping your binding on in the center of one of the long straight edges. Leave ~4" tail at the beginning.

Clip your binding all the way around the mat. Leave ~4" tail at the end. We're going to begin sewing right before the curve, where the pen is pointing. We want to leave all of that straight edge unsewn for right now. It's where we're going to finish our binding edge and where we're going to put the other snap tab.

When you sew on your binding, you want to make sure you keep a pretty even 1/4" SA all the way around so that your binding looks neat when you pull it to the front.

Stop sewing right after you finish going around the last curve. We want to leave that straight edge unsewn for now.
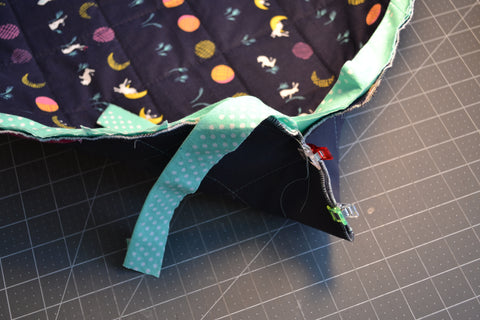
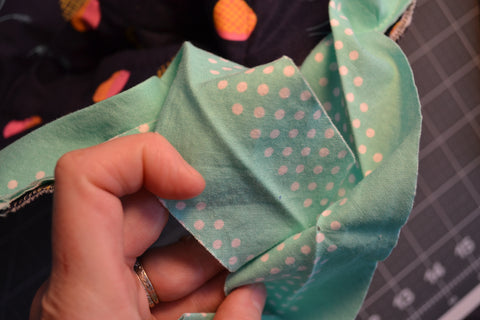
Even though we want to leave that edge unsewn, we need to attach the binding ends to each other. Clip the binding to the straight edge. When the binding ends are between ~1/8" and 1/4" from each other, pull one end away from the backing and one end towards the backing. (See pic below.)
Mark a dot where each pen is pointing. Those dots will show where to join the binding. We're leaving a bit of space between the binding since it's stretchy, we don't want excess after it's joined, so it's better to have it a bit snug.
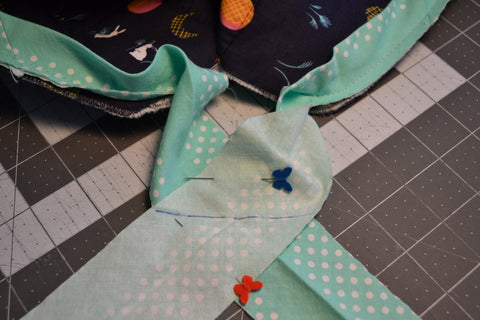
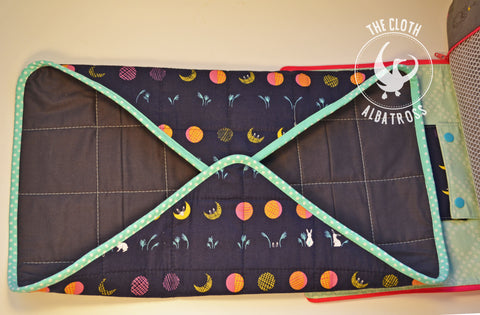
It's easier to join the binding strips with the quilt sandwich out of the way. Unclip the binding and use the clips to pinch the mat together.
Now that the mat is clipped out of the way, bring the binding RST in an X with the dots matched up.
Pin binding together and mark a line connecting the intersection of the binding pieces. This part can be a little confusing. Your straight line is correct if it's running parallel to the edge of the backing - when you're sewing, you'll be sewing parallel to the backing.
Sew directly on top of the line you just drew.

Before trimming your SA to 1/4" turn binding and make sure that it didn't get twisted and that it's the proper length.
Trim your SA and press open. Pin the binding out of the way.

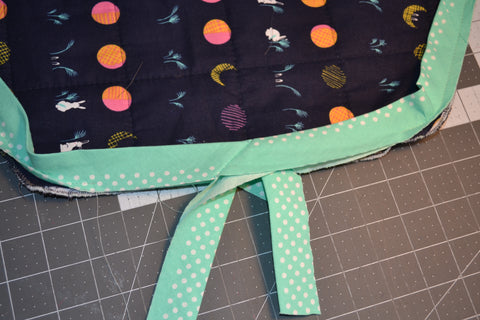
Get your snap tab and mark its center. Find the center of the straight unsewn edge of your mat, and clip your snap tab to it.

Baste snap tab to mat and then clip binding along the mat's edge and finish sewing the binding down.

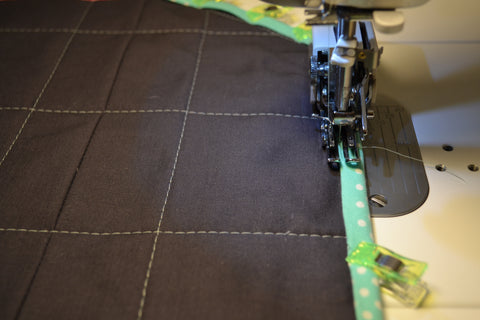
Pull the binding to the front of the mat. We have to get bossy with it, especially on the curves. You want the binding to hit right below where you stitch line from sewing the binding on the back is. So it's good for it to be a snug fit. The closer you are to stitching right by that line, the more likely your stitching on the front is going to hit your binding on the back.

Stitch right along the edge of the binding.

After your binding is stitched on, YOU'RE DONE!! The only thing left to do is to snap your mat into the front pocket of your bag and fold it up. This mat will be completely washable so when you're not completely tired of staring at this project, you can make an extra mat for when one is in the wash.


I truly hope you find this tutorial useful and make awesome bags with it. Be sure to share your work in the Blue Calla Facebook group or use the #Foxglovediaperbag tag on Instagram.