
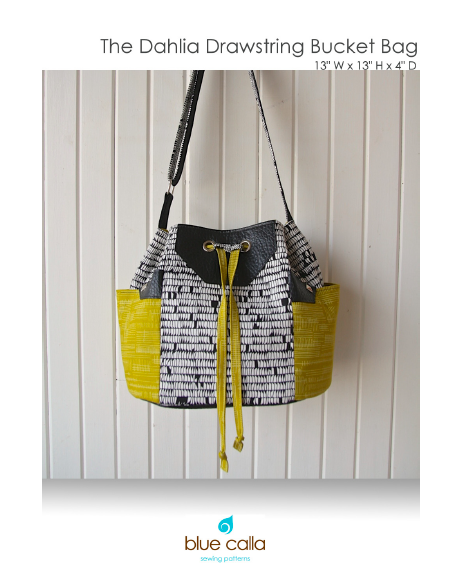
Dahlia Bucket Bag Sew-Along: DAY 1
Hi! I'm Crystal of The Cloth Albatross. Thank you so much for joining me for the Dahlia Bucket Bag sew-along (SAL). I really enjoy this pattern and hope that you will too! If you still need the pattern, you can purchase it here. For the duration of the SAL it will be 40% off with code dahliasal. If you have any questions about the pattern or the SAL, feel free to tag me in the Blue Calla Facebook group. Here is the original post with the prize announcement.
DAY 1: READING the pattern and, cutting and fusing the pieces
I know it's a bit strange to have reading the pattern on the itinerary but it's a step that some people skip (myself included). I always just like to dive right into things and not really think too much ahead, so reading patterns seems a bit tedious but it's a relief to be like, okay it seems like there's a lot of steps but there's really not that much work and then you can see how everything is going and it helps with pattern placement when you're thinking about layout.
After you've read the pattern, cut out your pattern pieces and tape them together. I like to print duplicates of all my pieces that are "cut on the fold" because I think it helps get a more precise pattern placement. Obviously, this is optional and you should use the pattern pieces as they best suit your style of cutting.

I like to get pattern pieces out of the way that I won't use again so that I won't feel daunted by all of the pieces. So I started with my Peltex pieces. After I cut out my (2) front panel pieces and (1) base. I set those pattern pieces to the side and now have 2 fewer pieces to worry about.

With the Peltex pattern pieces out of the way, I begin to think about the bag layout and which fabrics will work best. When thinking about woven fabric, Dahlia's exterior is separated into 3 main parts - front panel, side panel, and side pockets. You can choose to use the same fabrics for both your front panel and side panels, or 2 different fabrics, depending on the look you're going for. Picking out fabrics is one of my favorite parts of making a bag, so I usually opt for using 3 fabrics on the exterior of this pattern.
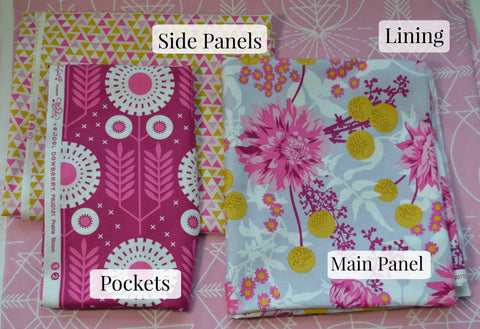
The above fabrics are what I chose for my Dahlia; they're Joel Dewberry Wander fabric. I chose a darker fabric for the pockets, and lighter fabric for the side panels, and a focal print for the front panel. The lining I wanted to be more of a low volume print so that the bag didn't turn out too busy.
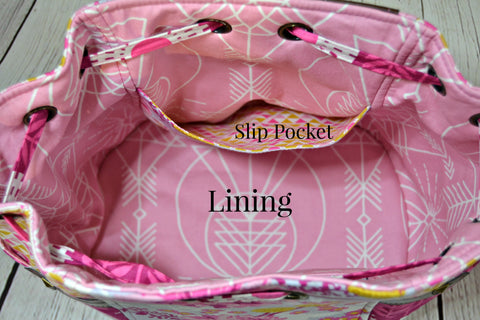
Here is the completed bag with parts labeled to help you when thinking about which fabrics you would like to choose and where they will end up on your finished bag:

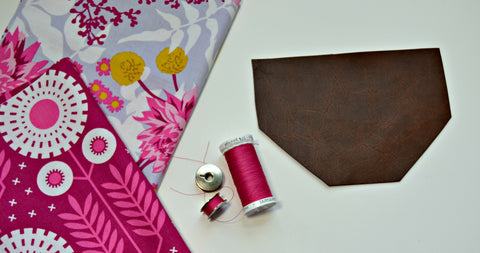
After you've decided on your fabrics, it's time to choose hardware, vinyl, and thread that complements it. Or, you might be dictated by which vinyl and hardware you have on-hand, so you may have to choose your fabrics based on those. I chose antique brass to go with my fabric choices. I decided that a grey zipper would work best on the lining since the focal print that I chose is grey and pink and my lining is pink. I also wanted to add some studs to the tips of my vinyl pocket overlays, but these are optional.

I thought that brown vinyl would complement my fabrics nicely and go well with my antique brass hardware. I also like to choose my thread color and wind a couple of bobbins before I start sewing. I likely will not need 2 bobbins but there's nothing that I hate more than having to wind a bobbin when I'm almost finished with a project. It's enough to make me quit sewing and not finish it until the next day. I chose a fuchsia thread because I knew that I wanted a darker color that wouldn't stand out too much against my vinyl in case I made any mistakes that I couldn't seam rip out without ruining the entire piece of vinyl.
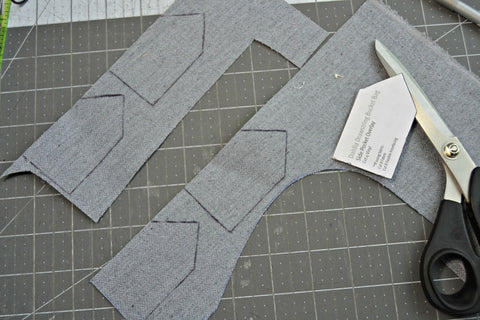
Holy cannoli there are a lot of rectangular pieces. I highly recommend using some sticky notes to label your pieces.


When I'm sewing my Peltex base to my vinyl, I like to draw the seam on the Peltex and I measure from the edge of the vinyl rather than from the edge of the Peltex. For example, if you're sewing 1/4" in from your Peltex and your seam allowance is 3/8", I measure 5/8" in from the edge of the vinyl and mark the seam on the Peltex. The reason for this is that the Peltex is never just perfectly aligned with the seam allowance in the vinyl and what you're going to be seeing from the right side is the stitching in reference to the edges of the vinyl, not the Peltex. That was a really long way of explaining why I draw a line. I apologize. Here are a couple of pictures:


Fusing interfacing
I didn't take any pictures of this most tedious step. It's my most hated part of making a bag. It takes forever and is really boring. I need a steam press in my life.
One thing that's easy to do is to fuse your SF101 to your front panels before putting your Peltex down. REMEMBER to put your Peltex down before fusing your SF101! If you forgot, all is not lost. You will just need to cut (2) extra pieces of SF101 to fuse over top of the Peltex.
For the fusible fleece, I highly recommend Pellon Fusible Thermolam Plus if it's available to you. It's much easier to fuse than others that I've tried and it's denser, so it gives the bag more structure. As much as I hate fusing fleece, I do not recommend foam for this bag because I think you will find it difficult to install your grommets. Not impossible but definitely difficult.
Speaking of grommets, Day 2 (Wednesday June 15th) of the SAL is reserved solely for grommet practice. Even though grommet installation is not until the very end of the bag, I want to make sure everyone is comfortable with installing grommets before we continue. The grommets used on this bag are from svagostudio on etsy. (The setter is also from there.)
I hope you'll join me again on Wednesday!
Crystal
1 comment
LOVE your fabric choices Crystal :)