If you prefer, you can download a printable PDF for these tutorials:
Sewing Bag Tutorial
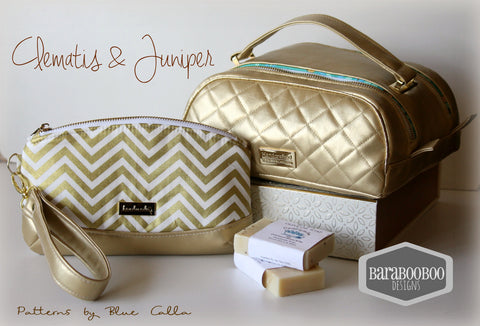
Although the Juniper was originally intended to be used as a toiletry bag, it also makes a fantastic sewing bag to hold your sewing tools and accessories. I am using my Juniper sewing bag to hold my clips, spare scissors, rotary blades and machine needles inside the bag. I am using the exterior pockets to hold smaller items: fray check, seam rippers, thread clippers, pens.
To hold these items, I've added 4 exterior slip pockets and 4 interior clear vinyl pockets.

Top View of Exterior pockets

View of Interior Clear Vinyl Pockets
I am also including some brief instructions on how to install the handle using metal bridge connectors instead of the handle in the pattern. These instructions will be found after the sewing bag tutorial.
SEWING BAG TUTORIAL:
In addition to the cutting list included in the pattern, you will also need to cut the following:
For each interior pocket:
(1) 11" W x 2.75" H clear vinyl (I use 12 gauge)
(1) 2" H x 44" (or WOF) to create your binding
For each exterior pocket:
(1) 11" W x 7" H exterior fabric
(1) 11" W x 7" H fusible woven interfacing
*** If you are making the interior pockets in both zippered compartments, double the quantities listed. Same for the exterior pockets.
FUSING:
Follow steps 1 - 8 in the pattern. In addition, you will fuse the woven interfacing to the WS of your exterior pocket pieces.
ASSEMBLY:
Before starting assembly, you will prepare your exterior pockets. 
Fold your exterior pocket pieces in half horizontally, WST and press the top folded edge. Topstitch the top folded edge.

Pin your exterior pocket pieces to the RS of your Exterior A (interfaced) panels with the raw edges of your pocket pieces aligned to the bottom edge of your Exterior A panels. Baste the pockets to the exterior panels with 1/4" seam allowance as shown in photo above (red lines).
Once the pockets are basted onto your Exterior Panel pieces, you can turn them over WS facing up and trim excess pocket from the sides.

Fold your Exterior panels (with attached pockets) in half vertically WST and mark the centre of your pockets, top and bottom.

Sew from the bottom centre mark to the top centre mark, sewing through all the layers to separate the pocket piece into 2 separate slip pockets. Repeat for second pocket piece on the other Exterior panel if you are putting pockets on both sides.
Complete steps 9 - 43 from the pattern.
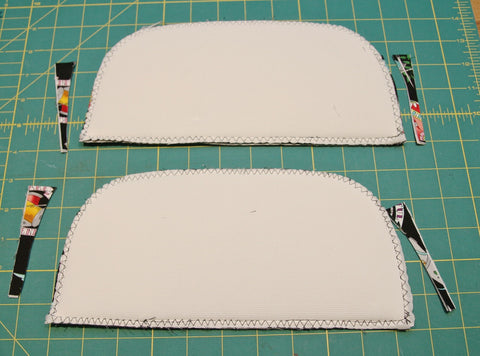
Before attaching your lining panels, let's sew the interior clear vinyl pockets.
Prepare the binding:


To prepare your 1/2" binding strips, take your binding fabric and fold in half, WST along the entire length and press. Open up the binding to reveal centre crease and fold in both halves towards the centre along the entire length, also WST and press. Fold in half again along original crease and press again. You should have a double fold binding strip that is 1/2" x 44" long (WOF). Cut the binding into 4 equal pieces that are 11" long.

Place each longer edge of your vinyl pocket piece inside a strip of binding and clip in place. (Do not use pins with vinyl).

For the pocket's bottom edge binding, topstitch the binding in place along the inside open edge of the binding ONLY with 1/8" seam allowance.

For the top edge's binding, topstitch the binding in place along the bottom AND top edge of the binding with a 1/8" seam allowance.

Place your vinyl pocket piece RS up on the RS of one Lining panel with the bottom edge of the pocket piece placed 1/2" above the corner notch of the Lining panel. Clip in place. Sew in place along the very bottom edge of the pocket's binding with 1/8" seam allowance. Baste the sides of the vinyl pocket piece to the Lining panel with 1/4" seam allowance.

Turn the Lining panel so it is WS facing up and trim excess vinyl pocket from the sides.

Fold the Lining panel in half vertically, WST to mark the centre on the top and bottom edges of the pocket (on the binding). As you did for the exterior pockets, sew from the bottom centre mark to the top centre mark to separate into 2 slip pockets.
Repeat steps to create the vinyl pockets for the second Lining panel piece.
Continue with pattern Step 44 until the end of the pattern.


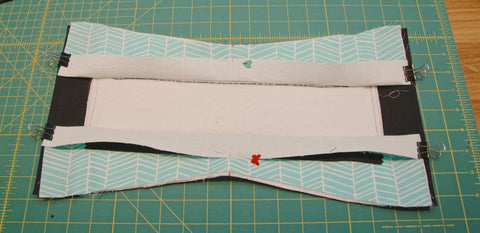
IMPORTANT: Make sure you are attaching the Lining panel pieces with the vinyl pockets on the inside STRAIGHT EDGE of your TOP PANEL B lining pieces as shown in photos above.
Tester Michelle of Barabooboo designs made this amazing Juniper sewing bag:
![]()

METAL BRIDGE CONNECTOR TUTORIAL:
You will need (2) bridge connectors with a ring wide enough to accommodate a 1" strap to complete this tutorial.
Start by completing Steps 1 - 35 from the pattern.

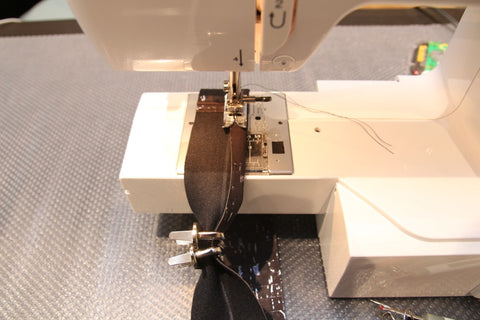
Before you sew the shorter ends of your handle piece, slip the handle piece through the rings of both bridge connectors.

Sew the ends together and topstitch seam allowance as instructed in Steps 37 and 38.
When sewing in both sides of the strap towards the centre as instructed in Step 39, you will need to keep sliding your bridge connectors out of the way.
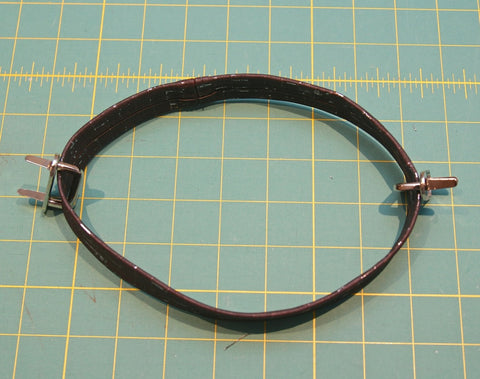
You will end up with a strap loop with the bridge connectors. Flip your handle strap so the raw seam is on the inside of the loop and the prongs of your bridge connectors are facing out as shown in the photo above.
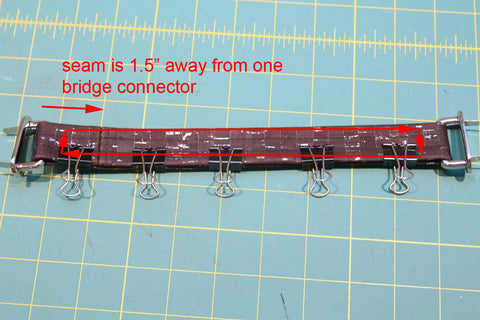
Flatten the strap loop with the seam placed 1.5" away from the ring of one connector and clip the strap layers together. (Note: this is farther away than instructed in the pattern to accommodate the bulk of the connector's ring) You will sew the strap loop together to create the handle by following the red arrows in the photo above and sewing a rectangle shape, 1/8" seam allowance from the longer edges and sewing across just below the bridge connector's ring.

If you'd like to add rivets to your handle, you may do so now. I added a rivet at each end, 1" from the connector's ring.
If you followed Step 35, the WS of your assembled TOP PANEL should look as pictured above. SKIP STEPS 42 - 43 IN THE PATTERN.

As instructed in Step 41, mark the location of your handles except you will want to move this location 1" towards the centre of your TOP PANEL.

Centre the washers of your connectors over the mark and use a fabric pen to mark the location of your connectors prongs.

Carefully cut out your prong holes and apply fray check.
Insert the prongs of your connectors into the prong holes in your TOP PANEL from the RS. Make sure the seam of your handle is not showing from above. You'll want it on the underside of your handle.

Place a piece of Peltex over your prongs, then your washers and fold your prongs inwards to secure.
YOU'RE DONE!
Tester Michelle of Barabooboo Designs also used metal connectors for this gorgeous Juniper: