

Lotus Handbag Sew Along DAY 4
Welcome Back! Day 4!!!! FINAL ASSEMBLY!!! Are you excited? By the end of today you will have completed your Lotus :)
Let's get at it!
Grab that 14" zipper! Mark the centre at 7", then we will be folding the zipper tape ends at the top. Fold them at a 45 degree angle towards the back and stitch them in place like this:

NOTE - I used a longer zipper and cut the end off, I put a dab of glue on the very end so it doesn't come apart, if you are using a 14" zipper like I should be, you repeat the above steps to the bottom tape ends as well.
Now take your lining pieces, fold them in half and mark their centres at the top.

Place one lining piece right side up and match the centre of the zip with the centre mark on the lining. Pin/clip in place - zip side UP!

Baste that in place just along the zipper tape with a 1/8" seam allowance. Now we will match up the lining with one side of the exterior. Match up all three center marks! Here are two different views as to what it should look like once pinned/clipped:


We want to sew all three layers together (lining, zipper tape, exterior) Starting and stopping where the zipper tape is folded. Make sure you backstitch. I like to do one run of stitches, flip the purse to see where I may have to get closer to the zipper, then do a second set of stitches (and sometimes a third!).

Your exterior will now look like this:

Flip, right sides out and press the exterior away from the lining. Repeat to the other side, lay your other lining piece on the table and match the center mark with the center mark on the other side of the zipper. Zip side up, baste in place. Then pin/clip the other exterior side to the side you just basted. It will look like this:

Now sew those three layers together - starting at one zip end and finishing at the other. Flip, and press away from the zipper.
Open your zipper as far as you can, we will now topstitch only along the zipper edge (sometimes I get carried away, forgot to take the "in action" shot - so here's a fake one)

Your bag should now resemble this!

If you are doing sew in connectors grab your pattern and follow Celine's steps now.
Now we will insert our side pockets :)
Flip your bag wrong side out and slip one of your side pockets into the side opening, make sure they are right sides together. Use the seams and the center marks as match up points and pin/clip in place:

Sew all the way around:

Now trim the seam allowances especially at those bulky seams joints.

Repeat for the other side pocket. Now turn your bag right side out, it should look like this:

(hee hee hee)
Tuck those pockets into the bag and press the top seams really well, top stitch all around both side pockets:

She will look like this:

Can you see the light???? LAST STEPS!!!!!
Flip that baby wrong side out again! We will now sew up the interior lining. Match the the interior, right sides together and sew from the bottom of the curve edge to the top where the zipper is. DO NOT SEW THROUGH THE ZIPPER. I have a hard time getting far enough up to the zipper so here's a little trick: Put your zip foot on your machine and place your lining so the zip foot is right against the zipper. Sew back and forth about 1/4" as close to the zipper as possible. Repeat for the other side.

See here:

That will ensure your zip pull will remain on the top of your bag where it belongs!
Now sew the bottom edges together but only stitch 2-3" on either end, this will be our turning hole so make sure you back-stitch well.

Open your seams on the bottom corner and the ends of the sides and match them up, boxing the corner like so:

Sew up the corners, making sure to go over them at least twice. Repeat for the other corner.

Now we will focus on the exterior. First things first:
MAKE SURE YOUR ZIPPER IS OPEN!!!!!
Now sew up the sides the same way as we did the interior. This time make sure to match up the seams where your bottom piece meets your exterior, use that zip foot trick again if you have to. Repeat to other side seam.

Box your corners as you did the interior:

after sewing both corners, trim the seam allowance at the corners without clipping your stitching.

It's the time of reckoning!!!
Turn that bag! Ease her through the hole we left at the bottom of the interior. Sometimes this can be a struggle, slowly ease her through, bit by bit, it will work!

Make sure everything looks right, that you remembered to sew in all the places you were supposed to :) I actually forgot to sew up one of my interior corners (you can see it at the very bottom of the above photo! Easy fix though - I just slipped it through the hole and sewed it up.
Now pull your lining out of the bag, press your opening shut and clip the hole:

sew as close to the edge as possible with a short stitch length, making sure to catch both sides of the hole

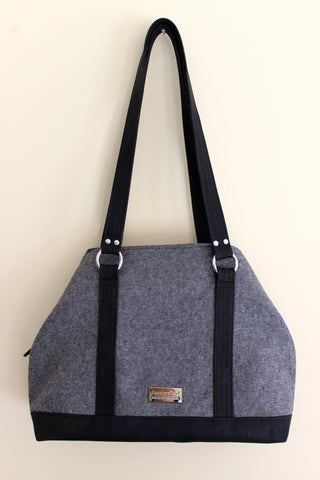
Tuck your lining in and YOU ARE DONE!!!! Now go take your new Lotus out for a cocktail, or two! You've earned it!!! Don't forget to use the hashtag #LOTUSSAL and tag the lovely Blue Calla when posting your photos! I hope you enjoyed my very first sew along, I'd like to thank Celine for giving me the opportunity to write it up! Cheers!!


2 comments
Don’t worry.
Cathy
Hi, I would like to put a couple more zips in instead of magnetic clasps can you tell me how I can.
Cathy